Bathtub Faucet Is Dripping: A Comprehensive Guide to Causes and Solutions
A dripping bathtub faucet can be an annoying and wasteful problem. Not only does it create a constant dripping sound, but it can also lead to increased water bills and even water damage. If your bathtub faucet is dripping, there are a few things you can do to troubleshoot and fix the problem.
Causes of a Dripping Bathtub Faucet
There are several potential causes of a dripping bathtub faucet, including:
- Worn-out washers: Washers are small, rubber or plastic rings that create a seal between the faucet handle and the valve stem. Over time, washers can wear out and become less effective at creating a seal, which can lead to dripping.
- Damaged or misaligned valve seat: The valve seat is the part of the faucet that the washer presses against to create a seal. If the valve seat is damaged or misaligned, the washer will not be able to create a proper seal, which will lead to dripping.
- Corroded or clogged aerator: The aerator is a small device that is attached to the end of the faucet spout. It helps to mix air into the water, which creates a more forceful stream. If the aerator is clogged or corroded, it can restrict the flow of water and cause the faucet to drip.
- Loose or damaged O-rings: O-rings are small, rubber or plastic rings that create a seal between different parts of the faucet. If an O-ring is loose or damaged, it can allow water to leak, which can lead to dripping.
How to Fix a Dripping Bathtub Faucet
The best way to fix a dripping bathtub faucet is to replace the worn-out or damaged parts. In some cases, you may be able to fix the problem yourself with a few simple tools and supplies. However, if you are not comfortable working on plumbing fixtures, it is best to call a plumber.
If you decide to try to fix the problem yourself, here are the steps you should follow:
- Turn off the water supply to the faucet. There should be two shut-off valves under the sink, one for the hot water and one for the cold water. Turn both valves clockwise to turn off the water.
- Remove the faucet handle. Most faucet handles are held in place by a screw. Use a screwdriver to remove the screw and then pull the handle off.
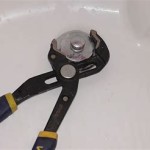
- Remove the cartridge or valve stem. The cartridge or valve stem is the part of the faucet that controls the flow of water. Depending on the type of faucet you have, you will either need to remove the cartridge or the valve stem. To remove the cartridge, simply pull it out of the faucet body. To remove the valve stem, use a wrench to loosen the packing nut and then pull the valve stem out of the faucet body.
- Inspect the washer or valve seat. If the washer is worn out or damaged, replace it with a new one. If the valve seat is damaged or misaligned, you will need to call a plumber to repair or replace it.
- Clean the aerator. Remove the aerator from the faucet spout and clean it with a brush or a vinegar solution. If the aerator is clogged or corroded, you may need to replace it with a new one.
- Replace the O-rings. Inspect the O-rings for any signs of wear or damage. If an O-ring is loose or damaged, replace it with a new one.
- Reassemble the faucet. Once you have replaced the worn-out or damaged parts, reassemble the faucet in the reverse order that you disassembled it.
- Turn on the water supply to the faucet. Check for any leaks. If there are no leaks, your faucet is now fixed.
If you have tried the steps above and the faucet is still dripping, you will need to call a plumber. A plumber will be able to diagnose the problem and repair or replace the necessary parts.

Faucet Repair How To A Leaky Bath

How To Stop A Dripping Bathtub Faucet Nj Plumbing Repair Replacement And Maintenance

11 Easy Steps To Fix A Leaking Bathtub Faucet In 2024 Spout

How To Fix A Leaky Bathtub Faucet Removing The Spout From

How To Fix A Bathtub Faucet From Leaking Dripping 3 Steps

How To Fix A Leaking Bathtub Faucet The Home Depot

11 Easy Steps To Fix A Leaking Bathtub Faucet

Bathtub Faucet Leaking Here S How To Fix It Repair Tub

How To Fix A Leaky Bathtub Faucet 6 Ways Stop Drips

My Tub Faucet Is Leaking Dripping Won T Stop Easy Fix