Bathtub Faucet Installation: A Step-by-Step Guide
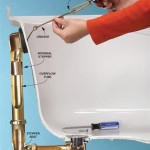
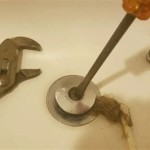
### Introduction A bathtub faucet is an essential part of any bathroom. It provides water for filling the bathtub, showering, and cleaning. If you're looking to install a new bathtub faucet, this guide will walk you through the steps involved. ### Tools and Materials Before you begin, you'll need to gather the following tools and materials: * New bathtub faucet * Adjustable wrench * Phillips head screwdriver * Flathead screwdriver * Plumber's putty * Teflon tape * Hacksaw * Safety goggles * Gloves ### Step 1: Turn off the Water Supply The first step is to turn off the water supply to the bathtub. This is usually done by turning the valve located under the sink. If there is no valve, you may need to turn off the main water supply to your home. ### Step 2: Remove the Old Faucet Once the water supply is turned off, you can remove the old faucet. To do this, use the adjustable wrench to loosen the nuts that hold the faucet in place. Once the nuts are loose, you can remove the faucet by hand. ### Step 3: Clean the Bathtub Surface Before you install the new faucet, you'll need to clean the bathtub surface. Use a damp cloth to wipe away any dirt or debris. You may also need to use a mild detergent to remove any soap scum. ### Step 4: Apply Plumber's Putty The next step is to apply plumber's putty to the base of the new faucet. This will help to create a watertight seal. To apply plumber's putty, simply roll it into a rope and then press it around the base of the faucet. ### Step 5: Wrap the Faucet Threads with Teflon Tape Once the plumber's putty is in place, you'll need to wrap the faucet threads with Teflon tape. This will help to prevent leaks. To wrap the faucet threads, simply start at the bottom of the threads and wrap the tape clockwise around the threads. ### Step 6: Install the New Faucet Now you're ready to install the new faucet. To do this, simply insert the faucet into the hole in the bathtub. Once the faucet is in place, tighten the nuts that hold it in place. ### Step 7: Connect the Water Supply Lines Once the faucet is installed, you'll need to connect the water supply lines. To do this, use the adjustable wrench to attach the water supply lines to the faucet. Make sure that the lines are connected tightly to prevent leaks. ### Step 8: Turn on the Water Supply Once the water supply lines are connected, you can turn on the water supply. Turn on the valve under the sink or the main water supply to your home. Check for leaks around the faucet. If you see any leaks, tighten the nuts that hold the faucet in place. ### Step 9: Test the Faucet Once the faucet is installed and there are no leaks, you can test the faucet. Turn on the faucet and let it run for a few minutes. Check for any leaks around the faucet. If you see any leaks, tighten the nuts that hold the faucet in place. ### Conclusion Installing a bathtub faucet is a relatively easy task that can be completed in a few hours. By following the steps in this guide, you can ensure that your new faucet is installed correctly and that there are no leaks.
Install A 1 Handle Tub And Shower Faucet Rona

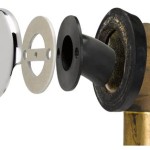
Learn How To Remove And Install Various Tub Spouts

Installing A Tub Faucet Fine Homebuilding
:strip_icc()/SCP_191_05-7b8dd5fde3f140a3ac838f2330698648.jpg?strip=all)
How To Install A Shower Or Tub Faucet

Learn How To Remove And Install Various Tub Spouts
:strip_icc()/SCP_191_07-2e153d67cdbf447eb1415fa9a30a13b9.jpg?strip=all)
How To Install A Shower Or Tub Faucet

How To Fix A Leaking Bathtub Faucet Diy Family Handyman

Installing A Tub Faucet Fine Homebuilding

Learn How To Remove And Install Various Tub Spouts

How To Replace A Bathtub Faucet Simply Designing With Ashley

