```html
Bathtub and Shower Faucet Replacement: A Comprehensive Guide
Replacing a bathtub or shower faucet can revitalize a bathroom, improve water efficiency, and address plumbing issues. While professional installation is often recommended, understanding the process and considerations involved empowers homeowners to make informed decisions and potentially tackle the project themselves with the appropriate expertise and tools.
This article provides a comprehensive overview of bathtub and shower faucet replacement, covering preparation, removal of the old faucet, installation of the new faucet, and essential post-installation checks. Understanding these steps is crucial for a successful and leak-free faucet replacement.
Preparation and Assessment
Before commencing any plumbing work, careful preparation is paramount. This stage involves gathering necessary tools and materials, identifying the existing faucet type, and understanding the plumbing connections. Rushing this process can lead to complications and delays.
Gathering Tools and Materials: The required tools typically include adjustable wrenches, pipe wrenches, a screwdriver set (Phillips and flathead), plumber's tape (Teflon tape), a basin wrench (for tight spaces), pliers, a bucket, rags or towels, and safety glasses. The new faucet set, including all necessary hardware (washers, O-rings, screws), a valve socket set (if replacing valve stems), penetrating oil (for corroded fittings), and silicone caulk or plumber’s putty are also vital. Having all these items readily available will streamline the replacement process.
Identifying the Existing Faucet Type: Bathtub and shower faucets come in various types, including compression faucets, ball faucets, cartridge faucets, and ceramic disc faucets. Understanding the specific type is crucial for both removal and replacement. Single-handle faucets, often cartridge or ceramic disc based, tend to have simpler internal mechanisms than two-handle faucets, which can be compression, ball, or cartridge based. A careful visual inspection and consulting the manufacturer's documentation (if available) can aid in identification.
Understanding Plumbing Connections: Bathtub and shower faucets connect to the water supply lines through various fittings, typically threaded pipes or compression fittings. The water supply lines themselves can be copper, PEX (cross-linked polyethylene), or galvanized steel. Identifying the type of connection is essential for selecting the correct replacement faucet and ensuring compatibility. Shut-off valves are ideally present on both hot and cold water supply lines leading to the faucet. If shut-off valves are absent or malfunctioning, shutting off the main water supply to the house may be necessary.
Safety Precautions: Prioritize safety by turning off the water supply to the bathroom or the entire house before starting any work. This prevents water damage and potential electrical hazards if electrical work is involved near the plumbing. Wear safety glasses to protect the eyes from debris. Adequate ventilation is also important, especially if using chemical cleaners or penetrating oil.
Removing the Old Faucet
The removal process varies depending on the faucet type and its connection method. A methodical and careful approach minimizes damage and potential complications.
Shutting Off the Water Supply: As mentioned before, this is the most critical step. Verify that the water is completely shut off by turning on the existing faucet. If water continues to flow, double-check the shut-off valves or the main water supply valve.
Removing Handles and Trim: Start by removing the faucet handles. These are typically held in place by screws, which may be concealed under decorative caps. Use a screwdriver to remove the screws and then gently pull off the handles. Remove any decorative trim plates or escutcheons surrounding the faucet spouts and handles. These may be held in place by screws or friction. Penetrating oil may be necessary to loosen corroded screws or trim.
Disconnecting the Faucet Body: Once the handles and trim are removed, the faucet body can be disconnected from the water supply lines. This typically involves unscrewing the faucet body from the threaded pipes or disconnecting compression fittings. Use adjustable wrenches or pipe wrenches to loosen the connections. Apply penetrating oil to stubborn connections to loosen them. Be prepared for residual water to drain from the pipes, so have a bucket and rags ready. For compression fittings, use two wrenches: one to hold the fitting on the supply line and the other to loosen the nut on the faucet.
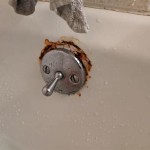
Dealing with Corroded or Stuck Fittings: Corrosion can make removing old faucets challenging. Penetrating oil can help loosen corroded fittings. Apply the oil liberally and allow it to soak for several minutes before attempting to loosen the connections. If the fittings are still stuck, gentle heat from a propane torch (used with extreme caution and following safety guidelines) can sometimes help. Alternatively, a specialized nut splitter tool can be used to cut through corroded nuts without damaging the surrounding pipes. If the pipes themselves are severely corroded, consider replacing them to prevent future leaks.
Preparing the Faucet Mounting Surface: After removing the old faucet, clean the mounting surface thoroughly. Remove any old plumber's putty or silicone caulk using a scraper or putty knife. Inspect the mounting surface for damage or corrosion. Repair any damage before installing the new faucet.
Installing the New Faucet
Installing the new faucet involves connecting it to the water supply lines, securing it to the mounting surface, and ensuring a watertight seal. Following the manufacturer's instructions is essential for a successful installation.
Preparing the New Faucet: Before installation, inspect the new faucet for any defects or missing parts. Apply plumber's tape (Teflon tape) to the threads of the faucet connections. Wrap the tape clockwise several times, overlapping each layer. This creates a watertight seal. Alternatively, pipe joint compound can be used in place of plumber's tape.
Connecting the Faucet Body: Carefully connect the faucet body to the water supply lines. Tighten the connections using adjustable wrenches or pipe wrenches. Avoid overtightening, as this can damage the fittings or pipes. If using compression fittings, ensure the compression ring is properly seated before tightening the nut. For threaded connections, tighten the fittings until they are snug and watertight.
Securing the Faucet to the Mounting Surface: Secure the faucet to the mounting surface using the hardware provided with the new faucet. This may involve tightening screws or nuts from underneath the sink or tub. Ensure the faucet is properly aligned and level before fully tightening the hardware. Apply plumber's putty or silicone caulk around the base of the faucet where it meets the mounting surface. This creates a watertight seal and prevents water from seeping behind the faucet.
Installing Handles and Trim: Install the faucet handles and trim plates according to the manufacturer's instructions. Tighten the handle screws securely, but avoid overtightening. Ensure the trim plates are properly aligned and flush with the mounting surface.
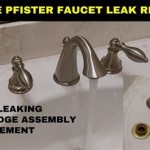
Addressing Potential Leaks: Once the faucet is installed, turn the water supply back on slowly. Inspect all connections for leaks. If leaks are present, tighten the connections slightly. If the leaks persist, disassemble the connection and reapply plumber's tape or pipe joint compound. In some cases, replacing the O-rings or washers may be necessary to achieve a watertight seal.
Valve and Cartridge Replacement (if applicable): If replacing the valves or cartridges within the faucet, ensure the correct replacement parts are being used. Carefully remove the old valves or cartridges and install the new ones, following the manufacturer's specific instructions for that model. Tighten any retaining nuts or screws to the specified torque. Incorrectly installed valves or cartridges can lead to leaks or reduced water flow.
Testing and Fine-Tuning: After completing the installation, test the faucet thoroughly. Turn the faucet on and off several times to ensure proper water flow and temperature control. Check for any leaks around the base of the faucet, the connections to the water supply lines, and the handles. Adjust the handle alignment or tension as needed to ensure smooth and effortless operation.
Caulking and Finishing Touches: Apply a bead of silicone caulk around the base of the faucet where it meets the tub or shower surround. This prevents water from seeping behind the faucet and causing damage. Smooth the caulk with a wet finger or a caulk smoothing tool. Clean up any excess caulk or debris. Dispose of the old faucet and any waste materials properly.
Post-Installation Checks
After completing the installation, several post-installation checks are crucial to ensure the new faucet is functioning correctly and to prevent future problems.
Leak Inspection: Conduct a thorough inspection for leaks around all connections, including the faucet body, handles, and supply lines. Place dry paper towels under the connections and check them periodically over the next 24 hours. Any dampness indicates a leak that needs to be addressed.
Water Flow and Temperature: Verify that the water flow is adequate and the water temperature is properly regulated. Check both hot and cold water flow to ensure there are no obstructions or restrictions. If the water pressure is low, inspect the aerator for debris or mineral buildup. Adjust the temperature settings on the water heater if necessary to achieve the desired water temperature.
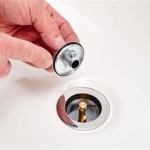
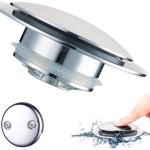
Drainage Functionality: Ensure that the bathtub or shower drain is functioning properly. Test the drain stopper to ensure it seals tightly and prevents water from leaking out. If the drain is slow or clogged, clean the drain using a drain snake or a chemical drain cleaner. Consider replacing the drain assembly if it is damaged or corroded.
Securing the Faucet: Double-check that the faucet is securely mounted to the tub or shower. Gently try to move the faucet to ensure it is not loose or wobbly. If the faucet is loose, tighten the mounting hardware as needed. A loose faucet can damage the surrounding plumbing and lead to leaks.
Documentation and Warranty: Keep the manufacturer's instructions and warranty information in a safe place. This information may be needed for future maintenance or repairs. Register the new faucet with the manufacturer to activate the warranty. If any problems arise with the faucet during the warranty period, contact the manufacturer for assistance.
```
Bath Tub And Shower Faucet Repair Step By

Danco Porcelain Cross Handle Bathtub And Shower Faucet Rebuild Kit 39696 The Home Depot

How To Replace A Bathtub Faucet

Tub And Shower Faucet Trim Replacement Armchair Builder Blog Build Renovate Repair Your Own Home Save Money As An Owner

Diy Bathtub Faucet Repair

Moen Adler Chrome 3 Handle Single Function Round Bathtub And Shower Faucet Valve Included In The Faucets Department At Com

How To Update A Bathroom With Low Cost Bathtub Shower Fixtures Fixture

Lincoln S Tub And Shower Rebuild Kit For American Standard Renu 3 Handle Faucets 111830 The Home Depot

Complete Guide For Leaky Shower Faucet Repair Valve Replacement Homeadvisor

Danco Metal Tub Shower Repair Kit Gerber In The Faucet Kits Components Department At Com
Related Posts