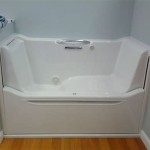
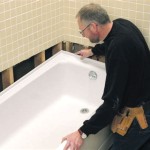
How To Install A Bootz Aloha Bathtub
Installing a new bathtub is a significant home improvement project that, while potentially challenging, can be accomplished by a homeowner with moderate DIY skills and the appropriate tools. This article provides a comprehensive guide on how to install a Bootz Aloha bathtub, a popular and durable option known for its porcelain-on-steel construction. The installation process involves several stages, from preparing the bathroom floor to connecting the drain and overflow. Careful planning and attention to detail are crucial for a successful installation and a leak-free, functional bathtub.
Before commencing the installation, it is imperative to consult the manufacturer's instructions specific to the Bootz Aloha model being installed. These instructions provide critical information regarding dimensions, support requirements, and recommended installation procedures. Deviation from these instructions may void the warranty or result in improper installation, leading to potential problems later. Furthermore, local plumbing codes must be adhered to throughout the installation process. Contacting the local building department to inquire about necessary permits and inspections is strongly recommended.
Proper safety precautions must be taken throughout the installation. Eye protection (safety glasses) should be worn to protect against debris. Work gloves protect hands from sharp edges and potential irritants. When cutting or drilling, a dust mask or respirator should be worn to prevent inhalation of dust particles. If any electrical work is required, such as wiring for a whirlpool feature (if applicable), the power must be turned off at the breaker box before commencing work. A qualified electrician should perform any complex electrical work.
Key Point 1: Preparing the Bathroom and Subfloor
The first step in installing a Bootz Aloha bathtub is preparing the bathroom and the subfloor. This involves removing the old bathtub, inspecting the subfloor for damage, and making any necessary repairs. The goal is to create a clean, level, and structurally sound surface for the new bathtub to rest upon.
Begin by turning off the water supply to the old bathtub. Locate the shut-off valves for both the hot and cold water lines, typically located near the faucet. If shut-off valves are not present, the main water supply to the house must be temporarily shut off. After turning off the water supply, disconnect the water lines from the faucet. Carefully consider how to dispose of any remaining water in the pipes to prevent water damage.
Next, remove the existing bathtub. This may involve cutting the caulk around the tub's perimeter with a utility knife. Depending on the type of tub and installation method, this may involve removing screws, nails, or other fasteners. In some cases, the tub may need to be broken apart to be removed safely. Use caution during this process to avoid damaging the surrounding walls or flooring.
Once the old bathtub is removed, thoroughly inspect the subfloor. Look for signs of water damage, rot, mold, or structural weakness. Any damaged areas must be repaired before proceeding. This may involve replacing sections of the subfloor with new plywood or OSB. Ensure the new subfloor material is the same thickness as the existing subfloor to maintain a level surface. Secure the new subfloor to the joists with screws or nails.
After the subfloor is repaired, thoroughly clean the area. Remove any debris, dirt, or dust. A level should be used to check the floor's levelness. If the floor is not level, shims can be used to create a level surface for the bathtub to rest upon. Place the shims strategically beneath the tub's support structure to distribute the weight evenly.
Finally, consider applying a waterproof membrane to the subfloor, especially in areas prone to moisture. This will provide an extra layer of protection against water damage and help prevent mold growth. Follow the manufacturer's instructions for applying the waterproof membrane. Allow the membrane to dry completely before proceeding to the next step.
Key Point 2: Installing the Drain and Overflow
Installing the drain and overflow assembly is a critical step in the bathtub installation process. It ensures proper drainage and prevents water from overflowing. This step typically involves assembling the drain components, connecting them to the bathtub, and connecting the drain to the existing plumbing.
Begin by assembling the drain and overflow components according to the manufacturer's instructions that accompany the drain assembly kit. Typically, this involves connecting the drain flange to the bathtub drain opening using plumber's putty or a silicone sealant to create a watertight seal. The overflow tube is then connected to the drain assembly using screws or other fasteners. Ensure all connections are tight and secure.
Before installing the bathtub, connect the drain tailpiece to the drain assembly. The drain tailpiece is the pipe that connects the drain assembly to the existing drain pipe in the floor. This connection may require cutting the tailpiece to the correct length using a pipe cutter. Apply pipe joint compound or Teflon tape to the threads of the tailpiece to create a watertight seal. Tighten the connection securely.
Carefully lower the Bootz Aloha bathtub into place, ensuring it rests securely on the prepared subfloor and shims. Connect the overflow tube to the overflow elbow, which is typically located behind the bathtub. Use plumber's putty or a silicone sealant to create a watertight seal. Tighten the connection securely.
Connect the drain tailpiece to the existing drain pipe in the floor. This connection may require using a P-trap, which is a curved pipe that traps water and prevents sewer gases from entering the bathroom. Use pipe joint compound or Teflon tape to the threads of the connections. Tighten the connections securely. After everything is connected, it's highly advisable to temporarily plug the drain and fill the bathtub with water to test for leaks. Carefully inspect all connections for any signs of leakage. If leaks are found, tighten the connections or reapply the sealant as needed.
If the tub has an integral drain assembly, which is pre-installed by the manufacturer, the focus shifts to connecting the drain tailpiece to the existing plumbing. The same principles of proper sealant application and secure connections apply. Consider using flexible connectors for drain pipes if there is a slight misalignment. These can simplify the process of connecting to existing drains without requiring precise pipe alignment.
Key Point 3: Securing the Bathtub and Finishing the Installation
Once the drain and overflow are properly installed, the next step is to secure the bathtub to the wall studs and finish the installation. This involves ensuring the tub is level, attaching it to the studs for stability, and caulking around the perimeter to prevent water damage.
Use a level to check the bathtub's levelness in both directions. If the tub is not level, adjust the shims under the bathtub's support structure until it is level. Once the tub is level, secure it to the wall studs using screws or nails. Predrill pilot holes through the bathtub's flange and into the studs to prevent cracking. Use screws or nails that are long enough to penetrate the studs securely. Space the fasteners evenly along the flange, following the manufacturer's recommendations.
After the bathtub is secured to the studs, install the faucet and showerhead, if applicable. Follow the manufacturer's instructions for installing these fixtures. Ensure all connections are tight and leak-free. Turn on the water supply to test the faucet and showerhead for proper operation.
Apply caulk around the perimeter of the bathtub where it meets the wall and floor. Use a high-quality mildew-resistant caulk to prevent mold growth. Smooth the caulk bead with a wet finger or a caulk smoothing tool for a professional finish. Allow the caulk to dry completely before using the bathtub, following the manufacturer's instructions. Inspect for any gaps and re-caulk as needed.
Install the bathtub surround, either tile or a pre-fabricated unit, according to the manufacturer's instructions. Ensure the surround is properly sealed to prevent water from penetrating the walls. Consider adding trim or molding to cover any gaps between the surround and the walls or ceiling. If installing tile, it is recommended to apply a waterproof membrane before tiling. This will provide additional protection against water damage and mold and mildew growth.
Finally, clean the bathtub and the surrounding area. Remove any debris, dirt, or dust. Inspect the installation for any imperfections or potential problems. A thorough inspection can identify issues before they cause any major problems. Be sure to consult official guides and resources for specific considerations when doing your remodels.
The information provided offers a general overview of how to install a Bootz Aloha bathtub. Each installation presents unique challenges and considerations. Consulting with a qualified plumber or contractor is recommended if there are any concerns or uncertainties about the installation process. Properly installed, a Bootz Aloha bathtub offers years of reliable service and enhances the enjoyment of the bathroom.

Bootz Industries Aloha 60 In X 30 Soaking Bathtub With Left Drain White 011 3365 00 The Home Depot

Bootzcast Bathtub Review And Installation Scrappy Geek

Bootzcast Bathtub Review And Installation Scrappy Geek

Have A Question About Bootz Industries Aloha 60 In X 30 Soaking Bathtub With Right Drain White Pg 2 The Home Depot

Bootz Tub Shower Base Installation

Bootz Industries Maui 60 In X 30 Soaking Bathtub With Right Drain White 011 3340 00 The Home Depot

Bootz Aloha 5 White Left Hand Porcelain Enamel Bathtub Jamaica Plumbing

Bootz Aloha 5 Bone Right Hand Porcelain Enamel Bathtub Jamaica Plumbing

Have A Question About Bootz Industries Aloha Nextile 30 In X 60 74 5 Standard Fit Alcove Bath And Shower Kit With Right Hand Drain White Pg 3 The Home Depot

Bootz 011 3365 00 Aloha 60 X 30 Porcelain Enamel Alcove Bathtub In White Af Supply
Related Posts

