How To Replace a Bathtub and Wall Surround in Mobile Homes
Replacing a bathtub and wall surround in a mobile home can significantly improve the aesthetics and functionality of the bathroom. This comprehensive guide outlines the necessary steps, tools, and considerations for successfully completing this home improvement project. While the process shares similarities with standard home renovations, mobile homes often present unique challenges due to construction materials and space limitations. Careful planning and execution are crucial for a satisfactory outcome.
Before commencing any work, it's paramount to assess the existing plumbing and framing. Mobile homes may have different plumbing configurations or utilize lighter-gauge materials compared to site-built homes. This necessitates a thorough inspection to identify potential issues and ensure the chosen replacement fixtures are compatible with the existing setup. Ignoring this initial assessment can lead to complications and delays during the installation process.
Safety is of utmost importance. Always shut off the water supply to the bathroom before disconnecting any plumbing. Wear appropriate personal protective equipment, including safety glasses, gloves, and a dust mask, to protect against potential hazards. If unfamiliar with plumbing or electrical work, consider consulting a qualified professional to avoid damage or injury.
Key Point 1: Preparation and Demolition
The initial phase of replacing a bathtub and wall surround involves meticulous preparation and careful demolition of the existing components. This stage sets the foundation for a smooth and efficient installation process.
Gathering the Necessary Tools and Materials: Before initiating demolition, assemble all the required tools and materials. Essential tools include a screwdriver set, adjustable wrench, pipe wrench, utility knife, pry bar, reciprocating saw (with metal-cutting blades), level, measuring tape, caulk gun, and a shop vacuum. Materials will consist of the new bathtub, wall surround, plumbing fittings, sealant, shims, screws, and any necessary patching compounds.
Protecting the Work Area: Protect surrounding surfaces from damage by covering them with drop cloths or plastic sheeting. This includes the bathroom floor, adjacent walls, and any fixtures that will remain in place. Secure the protective coverings with painter's tape to prevent them from shifting during demolition.
Shutting Off the Water Supply: Locate the main water shut-off valve for the bathroom and turn it off completely. After shutting off the water, open the faucet to relieve any remaining pressure in the pipes. This prevents unexpected water leakage during the plumbing disconnection process.
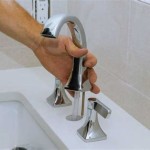
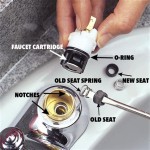
Removing Existing Fixtures: Begin by removing any easily detachable fixtures, such as the showerhead, faucet handles, and drain stopper. Use the appropriate tools to unscrew or detach these components, taking care not to damage the surrounding plumbing.
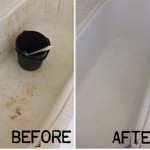
Demolishing the Wall Surround: Carefully remove the existing wall surround. This typically involves scoring the edges of the surround with a utility knife to break the caulk seal. Then, use a pry bar or similar tool to gently pry the surround away from the wall. Be mindful of potential asbestos in older mobile homes, and consult with a professional if any concerns arise.
Removing the Bathtub: Disconnect the drain and overflow pipes from the existing bathtub using a pipe wrench. These connections may be corroded, requiring patience and potentially penetrating oil to loosen them. Once the plumbing is disconnected, carefully remove the bathtub. Depending on the bathtub's construction, it may be necessary to cut it into smaller pieces using a reciprocating saw for easier removal. Take precautions when cutting to avoid damaging the subfloor or adjacent walls.
Cleaning and Inspecting the Subfloor: After removing the bathtub and surround, thoroughly clean the subfloor and surrounding wall studs. Remove any debris, old adhesive, or caulk. Inspect the subfloor for signs of water damage or rot. If any damage is found, repair or replace the affected areas before proceeding with the installation.
Key Point 2: Bathtub Installation
Installing the new bathtub requires careful attention to alignment, leveling, and proper plumbing connections. This stage ensures the bathtub is stable, watertight, and functions correctly.
Preparing the Bathtub Area: Ensure the subfloor is clean, level, and structurally sound. If necessary, use shims to level the area where the bathtub will sit. A level subfloor is critical for proper bathtub support and drainage.
Positioning the Bathtub: Carefully maneuver the new bathtub into position. Align it with the drain opening and ensure it fits snugly within the designated space. Avoid forcing the bathtub into place, as this could cause damage. If the bathtub is equipped with leveling feet, adjust them to ensure the bathtub is perfectly level.
Leveling and Securing the Bathtub: Use a level to check the bathtub's horizontal and vertical alignment. Adjust the leveling feet or add shims as needed to achieve a perfectly level surface. Once the bathtub is level, secure it to the wall studs using screws or nails. Follow the manufacturer's instructions for proper fastening techniques.
Connecting the Drain and Overflow: Connect the drain and overflow pipes to the new bathtub. Use Teflon tape or pipe sealant on the threaded connections to ensure a watertight seal. Tighten the connections using a pipe wrench, taking care not to overtighten and damage the fittings.
Testing the Plumbing: Before proceeding with the wall surround installation, test the bathtub's plumbing for leaks. Turn on the water supply and fill the bathtub with water. Check the drain and overflow connections for any signs of leakage. If any leaks are detected, tighten the connections or replace the fittings as needed. Continue testing until all leaks are resolved.
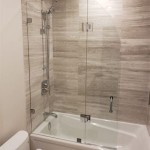
Key Point 3: Wall Surround Installation
The installation of the wall surround is crucial for creating a watertight and aesthetically pleasing enclosure. Proper alignment, sealing, and finishing are essential for a professional-looking result.
Preparing the Wall Surface: Ensure the wall surface is clean, dry, and free of any debris. Repair any holes or imperfections in the wall using patching compound. Sand the patched areas smooth and prime the entire wall surface to promote adhesion of the wall surround adhesive.
Cutting and Fitting the Wall Surround Panels: Measure and cut the wall surround panels to the appropriate size using a utility knife or saw. Dry-fit the panels to ensure they fit correctly around the bathtub and any existing fixtures. Make any necessary adjustments before applying adhesive.
Applying Adhesive: Apply a generous amount of construction adhesive to the back of each wall surround panel. Follow the manufacturer's instructions for adhesive application. Spread the adhesive evenly across the panel surface, paying particular attention to the edges.
Installing the Wall Surround Panels: Carefully position each wall surround panel against the wall, aligning it with the bathtub and adjacent panels. Press the panel firmly against the wall to ensure good adhesion. Use a level to check the panel's vertical alignment. If necessary, use shims to maintain alignment while the adhesive dries.
Sealing the Seams and Edges: Once the adhesive has dried, seal the seams between the wall surround panels and the edges where the surround meets the bathtub and surrounding walls. Use a high-quality caulk specifically designed for bathroom applications. Apply the caulk smoothly and evenly, creating a watertight seal. Smooth the caulk bead with a wet finger or a caulk smoothing tool.
Installing Fixtures and Finishing Touches: Reinstall any fixtures that were removed during demolition, such as the showerhead, faucet handles, and drain stopper. Ensure all connections are secure and watertight. Install any trim pieces or accessories according to the manufacturer's instructions. Clean the entire area and remove any debris.
Proper ventilation is vital in bathrooms, especially after installing a new bathtub and surround. Ensure the bathroom fan is functioning correctly to prevent moisture buildup, which can lead to mold and mildew growth. Regularly clean the bathtub and surround to maintain its appearance and prevent the accumulation of soap scum and grime. Periodic inspection of caulk lines and plumbing connections is recommended to identify and address any potential issues early on.

Replace Or Repair A Mobile Home Bathtub

How To Remove Tub Surround From Mobile Home

R G Supply Mobile Home Bathtubs And Surrounds

Installing A Bathtub In Our Mobile Home This Trick Will Save You From Having Water Damage

The Basics Of Replacing Your Mobile Home Bathtub Outfitters

Removing A Fiberglass Bath And Surround

Mobile Home Bathroom Guide

Mobile Home Bathroom Guide

How To Install A Shower Surround The Home Depot

Mobile Home Bathroom Guide
Related Posts