Here's an article addressing how to replace a bathtub gasket, adhering to your specifications:
How To Replace a Bathtub Gasket
The bathtub gasket, often overlooked, plays a critical role in preventing water damage. It forms a watertight seal between the bathtub drain and the surrounding drain pipe. Over time, this gasket can deteriorate due to exposure to water, cleaning chemicals, and general wear and tear. When this happens, leaks can occur, potentially leading to mold growth, structural damage to flooring, and increased water bills. Replacing a worn or damaged bathtub gasket is a relatively straightforward DIY project that can save property owners significant repair costs in the long run.
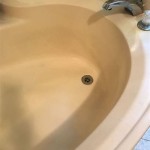
Before embarking on this project, it is essential to properly identify the type of gasket experiencing issues. Bathtubs typically utilize one of two primary gasket types: a drain gasket and an overflow gasket. The drain gasket seals the connection between the bathtub drain flange and the drain pipe beneath the tub. The overflow gasket, located behind the overflow plate, seals the connection between the overflow pipe and the bathtub itself. Understanding which gasket is leaking is crucial for acquiring the correct replacement part and focusing repair efforts effectively.
Proper preparation is paramount for a successful gasket replacement. This includes gathering the necessary tools and materials, as well as taking steps to ensure personal safety and protect the work area. Rushing into the project without adequate preparation can lead to frustration, potential damage, and the need for more extensive repairs.
Key Steps in Bathtub Gasket Replacement
The process of replacing a bathtub gasket involves several key steps, each requiring careful attention to detail. These steps include proper preparation, removing the old gasket, installing the new gasket, and verifying the seal. While the specific steps may vary slightly depending on the bathtub and the type of gasket being replaced, the overall process remains consistent.
Preparation: The initial stage involves gathering essential tools and materials. These typically include a screwdriver (both flathead and Phillips head may be necessary), pliers, a putty knife or scraper, a new replacement gasket (matching the original in size and type), plumbers putty or silicone sealant, a bucket or basin to catch any residual water, and cleaning supplies (such as a sponge and cleaning solution). Additionally, it is advisable to wear safety glasses and gloves to protect against debris and potential irritants. A work light may also be beneficial, especially if the under-tub area is poorly lit.
Before starting, shut off the water supply to the bathroom to prevent accidental flooding. Place a towel or drop cloth around the bathtub drain to protect the surrounding area from scratches and spills. Open a window or ensure proper ventilation in the bathroom to dissipate any fumes from cleaning agents or sealants.
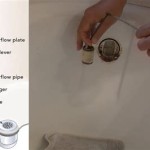
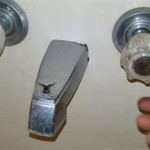
Removing the Old Gasket: This is often the most challenging part of the process, as old gaskets can become brittle and adhere tightly to the surrounding surfaces. Begin by removing the drain stopper or overflow plate, depending on which gasket is being replaced. Use the appropriate screwdriver to loosen the screws holding the drain flange or overflow plate in place. Once the screws are removed, carefully detach the drain flange or overflow plate from the bathtub.
With the drain flange or overflow plate removed, the old gasket will be exposed. Use a putty knife or scraper to gently dislodge the gasket from the surrounding surfaces. Work carefully to avoid damaging the bathtub or drain pipe. If the gasket is particularly stubborn, applying a small amount of penetrating oil or heat from a hairdryer may help to loosen it. Once the gasket is removed, thoroughly clean the surrounding surfaces with a sponge and cleaning solution to remove any residual sealant or debris. Ensure the surfaces are dry before proceeding to the next step.
Installing the New Gasket: The installation process begins with preparing the new gasket. If using plumbers putty, roll a small amount into a rope-like shape and apply it to the underside of the drain flange or overflow plate. This will help to create a watertight seal. If using silicone sealant, apply a thin bead around the edge of the drain flange or overflow plate where it will contact the bathtub surface. Position the new gasket on the drain flange or overflow plate, ensuring it is properly aligned. Carefully reattach the drain flange or overflow plate to the bathtub, aligning the screw holes. Tighten the screws gradually and evenly, avoiding overtightening, which could damage the gasket or the bathtub. Remove any excess plumbers putty or silicone sealant with a clean cloth.
Verifying the Seal: After installing the new gasket, it is crucial to test the seal to ensure it is watertight. Turn the water supply back on and allow water to run into the bathtub. Carefully inspect the area around the drain and overflow for any signs of leaks. If a leak is detected, tighten the screws slightly or apply additional sealant as needed. Allow the sealant to cure completely before using the bathtub. This typically takes 24 to 48 hours, depending on the type of sealant used.
Choosing the Right Replacement Gasket
Selecting the correct replacement gasket is crucial for a successful repair. Using the wrong type or size of gasket can result in leaks and the need for repeat repairs. The most effective way to choose the right replacement gasket is to take the old gasket to a hardware store or plumbing supply store and compare it to the available options. Alternatively, measure the dimensions of the old gasket and use these measurements to find a matching replacement online.
When choosing a replacement gasket, consider the material. Gaskets are typically made from rubber, silicone, or neoprene. Rubber gaskets are generally less expensive but may not be as durable as silicone or neoprene gaskets. Silicone gaskets offer excellent resistance to water, chemicals, and temperature extremes, making them a good choice for most bathtub applications. Neoprene gaskets are also durable and resistant to water and chemicals, and are often used in commercial or industrial settings. Select a gasket material that is compatible with the type of cleaning products used and the overall water quality in the area. Hard water or aggressive cleaning chemicals can accelerate the deterioration of certain gasket materials.
Furthermore, consider the thickness and shape of the gasket. The new gasket should match the thickness and shape of the old gasket as closely as possible. Using a gasket that is too thin or too thick can prevent a proper seal, while using a gasket with the wrong shape may not fit properly. Pay close attention to the inner and outer diameters of the gasket, as well as the shape of the sealing surface. Some gaskets have a flat sealing surface, while others have a raised or contoured surface. Ensure the replacement gasket matches the original in these respects.
Addressing Potential Challenges
While replacing a bathtub gasket is generally a straightforward DIY project, certain challenges can arise. One common challenge is dealing with corroded or damaged drain pipes. If the drain pipe is heavily corroded or damaged, it may be necessary to replace it entirely. This is a more complex project that may require the assistance of a licensed plumber. Attempting to install a new gasket on a damaged drain pipe will likely result in leaks and further problems.
Another common challenge is removing a stuck or stubborn gasket. As mentioned earlier, applying penetrating oil or heat can help to loosen a stuck gasket. However, it is important to exercise caution when using these methods to avoid damaging the bathtub or drain pipe. Avoid using excessive force, which could crack or break the gasket or the surrounding surfaces. If the gasket remains stubbornly stuck, consider using a specialized gasket removal tool, which can be found at most hardware stores.
Additionally, leaks can still occur even after installing a new gasket. In some cases, this may be due to improper installation or using the wrong type of sealant. Double-check the installation to ensure the gasket is properly aligned and the screws are tightened evenly. Ensure the sealant is applied correctly and allowed to cure completely before using the bathtub. If leaks persist, it may be necessary to replace the drain flange or overflow plate, as these components can also develop leaks over time. It is also essential to ensure that the drain pipe itself is not cracked or damaged, as this can also cause leaks that may be mistaken for a faulty gasket.
Finally, if unfamiliar with plumbing repairs or uncomfortable working in tight spaces, consider contacting a qualified plumber. While replacing a bathtub gasket is often a manageable DIY project, it is essential to prioritize safety and avoid attempting repairs beyond personal skill level. A professional plumber can quickly and efficiently diagnose and resolve any plumbing issues, preventing potential damage and ensuring long-term reliability.

How To Replace Bathtub Drain Shoe Gasket

Easy Replacement Of A Bathtub Drain

How To Replace Bathtub Overflow Drain Gasket

How To Replace A Bathtub Drain

How To Replace A Bathtub Drain

Tutorial Bathtub Overflow Gasket Replacement

How To Replace Bathtub Drain Stopper With A Lift And Turn Diy

Replacing A Tub Drain Bathtub Removal And Replacement

How To Replace A Bathtub Drain

How To Remove Broken Bathtub Drain Without Special Removal Tool Cross Members
Related Posts