How to Change a Faucet in a Bathtub
A leaky or outdated faucet in your bathtub can be a source of frustration and unnecessary water waste. Replacing a bathtub faucet is a relatively straightforward task that can be completed in a few hours with the right tools and materials. Here's a step-by-step guide to help you get the job done:
Gather Your Tools and Materials
Before you start, gather the following tools and materials:
- Phillips head and flathead screwdrivers
- Adjustable wrench or basin wrench
- Plumber's putty or Teflon tape
- Flashlight (optional)
- New bathtub faucet and any necessary mounting hardware
Turn Off the Water Supply
Shut off the hot and cold water supply valves located under the sink or behind the access panel in the tub enclosure. If you can't find the valves, turn off the main water supply to your home.
Disconnect the Old Faucet
Use the adjustable wrench or basin wrench to disconnect the water supply lines from the faucet. If the lines are corroded or difficult to remove, apply penetrating oil to loosen them.
Once the water lines are disconnected, slide under the bathtub and locate the mounting nuts holding the faucet in place. Use a wrench or screwdriver to loosen and remove these nuts.
Carefully lift the old faucet up and out of the bathtub.
Clean the Mounting Surface
Remove any old plumber's putty or sealant from the mounting surface where the new faucet will be installed. Use a clean rag and rubbing alcohol to clean the surface thoroughly.
Apply Plumber's Putty or Teflon Tape
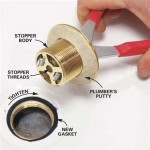
Roll a rope of plumber's putty and place it around the base of the new faucet. Alternatively, you can wrap the threads of the faucet with several layers of Teflon tape.
The purpose of plumber's putty or Teflon tape is to create a watertight seal between the faucet and the bathtub.
Install the New Faucet
Insert the new faucet into the mounting hole and hand-tighten the mounting nuts. Use a wrench or screwdriver to further tighten the nuts, but avoid overtightening.
Connect the water supply lines to the faucet and tighten them securely with the wrench or basin wrench.
Turn On the Water Supply and Test the Faucet
Turn on the hot and cold water supply valves and check for any leaks around the faucet base or water supply lines.
If you notice any leaks, tighten the connections or replace the plumber's putty or Teflon tape as needed.
Congratulations!
You have successfully changed the faucet in your bathtub. Enjoy the convenience of a new, leak-free fixture.

How To Replace A Mobile Home Bathtub Faucet Parts Latest News

How To Install A Tub Spout The Home Depot With Thisoldhouse

How To Replace A Bathtub Spout Diy Family Handyman

How To Fix A Leaking Bathtub Faucet The Home Depot

How To Replace A Bathtub Faucet

Replacing Shower Tub Faucet How To Install A New

Learn How To Remove And Install Various Tub Spouts

Installing A Tub Faucet Fine Homebuilding

How To Replace A Bathroom Faucet Home Repair Tutor

How To Fix A Leaky Bathtub Faucet 6 Ways Stop Drips


