Essential Aspects of Removing Tile Around Bathtub Drain
Replacing or repairing the tiles around a bathtub drain requires careful removal of the existing tiles. This process demands precision and attention to detail to prevent damage to the surrounding areas and ensure a successful installation of the new tiles. Here are essential aspects to consider when removing tile around a bathtub drain:
Safety First
Protect yourself by wearing safety glasses, gloves, and a dust mask. Ensure proper ventilation by opening windows or using a fan, as the process may produce dust and debris.
Locate the Drain Assembly
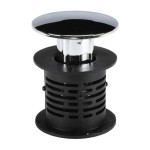
Identify the drain assembly beneath the bathtub. This assembly typically consists of a drain flange, a rubber gasket, and a drain stopper. Carefully remove the drain stopper and unscrew the drain flange to expose the underlying tiles.
Protect the Bathtub and Drain Assembly
Place a cloth or towel around the bathtub and drain assembly to protect them from scratches or damage during the tile removal process.
Choose the Right Tools
Use the appropriate tools for the job, such as a utility knife, a pry bar, and a hammer or chisel. A utility knife with a sharp blade can cut through the grout, while a pry bar helps pry the tiles off the substrate. A hammer or chisel can assist in removing stubborn tiles or grout.
Cut the Grout
Using a utility knife, carefully score the grout lines around the tiles. This will weaken the bond between the tiles and the grout, making them easier to remove.
Pry the Tiles Loose
Slowly insert the tip of a pry bar underneath the edge of a tile. Gently pry the tile loose from the substrate, taking care not to damage the surrounding tiles or the bathtub.
Remove the Tiles
Once the tiles are pried loose, carefully remove them by hand or with a hammer and chisel. If the tiles are still attached to the substrate, apply more force or use a chisel to break the bond.
Clean the Substrate
Once all the tiles are removed, thoroughly clean the substrate to remove any remaining grout or adhesive. This will ensure a smooth and even surface for the new tile installation.
Additional Tips
If the tiles are particularly stubborn, apply a penetrating oil or lubricant to the grout lines to soften the bond.
Use caution when working near the drain assembly to avoid damaging the drain flange or gasket.
If the tiles are difficult to pry loose, score the grout lines more deeply or apply more force to the pry bar.
Removing tile around a bathtub drain can be a challenging but manageable task with the proper preparation, tools, and techniques. By following these essential aspects, you can effectively remove the old tiles and prepare the surface for a successful tile installation.

How To Remove An Old Bathtub Dumpsters Com

How To Remove And Replace A Bathtub The Home Depot With Thisoldhouse

5 Easy Ways To Unclog Bathtub Drain

How To Tile Around A Jacuzzi Tub The Handyman S Daughter

Tips On How To Remove Old Shower Tile Ugly Duckling House

How To Replace A Tile Shower Drain Art Renovation

How To Replace Bathtub Drain Trim Kit

3 Ways To Block A Bathtub Drain Without Plug Ricks Plumbing

How To Remove And Replace A Bathtub The Home Depot With Thisoldhouse
.jpg?strip=all)
Installing The Ceramic Tile Tub Surround My Old House Ibuildit Ca

