How to Effortlessly Replace a Moen Bathtub Faucet Cartridge
Encountering a malfunctioning Moen bathtub faucet cartridge can be a minor inconvenience that can swiftly transform into a major plumbing conundrum. To rectify this situation, it is imperative to embark on a DIY cartridge replacement endeavor. This comprehensive guide will meticulously walk you through each pivotal step, empowering you with the knowledge and confidence to restore your faucet's pristine functionality.
Essential Tools and Materials:
Before embarking on this plumbing adventure, it is crucial to meticulously gather an arsenal of essential tools and materials:
- Adjustable wrench or basin wrench
- Phillips screwdriver
- Allen wrench (if required)
- Replacement Moen bathtub faucet cartridge
- Plumber's putty (optional)
Step-by-Step Guide:
- Turn Off Water Supply: Begin by closing the water supply valves situated beneath the sink. If your bathtub lacks accessible valves, locate and shut off the main water supply to your residence.
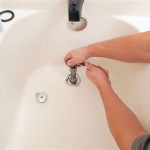
- Remove Handle: Utilize a Phillips screwdriver to cautiously detach the handle from the faucet. Concealed beneath the handle is a small screw that must be removed.
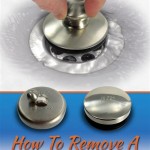
- Unscrew Cartridge Nut: Employ an adjustable wrench or a basin wrench to loosen and remove the cartridge nut. It may be concealed by a decorative cap, which must be carefully pried off.
- Extract Old Cartridge: Gently grasp the old cartridge and pull it directly towards you to extract it from the faucet body. If the cartridge is particularly stubborn, you may need to employ a pair of pliers.
- Apply Plumber's Putty (Optional): To enhance the watertight seal, apply a thin layer of plumber's putty around the base of the new cartridge. This step is optional but highly recommended.
- Insert New Cartridge: Align the new cartridge with the faucet body and carefully insert it by pushing it straight in until it is firmly seated. Ensure that the cartridge is properly oriented.
- Secure Cartridge Nut: Hand-tighten the cartridge nut onto the faucet body as much as possible. Subsequently, utilize the adjustable wrench to further tighten the nut, ensuring that it is adequately snug but not excessively overtightened.
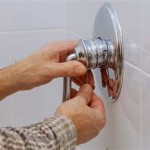
- Reinstall Handle: Reposition the handle onto the faucet and secure it using a Phillips screwdriver. Tighten the screw firmly to prevent any subsequent movement.
- Turn On Water Supply: Slowly turn on the water supply valves situated beneath the sink or, if inaccessible, the main water supply to your residence. Inspect for any leaks around the cartridge and promptly address any if necessary.
Congratulations! You have successfully replaced the Moen bathtub faucet cartridge, restoring your faucet to its former glory. If you encounter any difficulties or uncertainties during the process, do not hesitate to seek professional assistance from a qualified plumber.

How To Replace A Moen Cartridge And Fix Leaky Bathtub Faucet It Tutorials

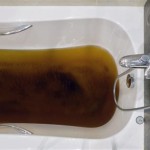
Moen Bathtub Drippingfaucet Repair

Replace A Moen Shower Cartridge Fix Leaky Tub Faucet

Replacing A Stuck Moen Shower Valve Cartridge

How To Replace A Moen Shower Cartridge

How To Fix Leaky Shower Tub Faucet Replace Moen 1200 Or 1225 Cartridge Demo

Moen Shower Faucet Cartridge Replacement Lever Is Hard To Turn

Diy Bath And Shower Mixer Valve Repair Moen 1222 Posi Temp Cartridge Replacement It S Easy

How To Replace A Single Handle Shower Cartridge In 3 Steps

Remove And Install Moen 1222 Cartridge Repair Shower Tub Faucet Set Temperature Limit
Related Posts