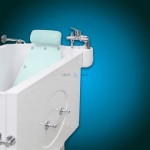
How to Remove a 3-Piece Bathtub Faucet
Replacing a bathtub faucet is a relatively simple plumbing project that can be completed in a few hours. If your bathtub faucet is leaking, dripping, or simply outdated, you can save money by doing the job yourself. Here are the steps on how to remove a 3-piece bathtub faucet:
Tools and Materials
Before you begin, gather the following tools and materials:
- Adjustable wrench
- Allen wrench set
- Basin wrench
- Bucket
- Flashlight
- New bathtub faucet
- Plumber's putty
- Safety glasses
- Screwdriver
- Wrench
Step 1: Turn Off the Water Supply
The first step is to turn off the water supply to the bathtub. There should be two shut-off valves located under the sink. Turn the valves clockwise to turn off the water.
Step 2: Remove the Faucet Handles
Once the water is turned off, remove the faucet handles. Most handles are held in place by a small screw. Use a screwdriver to remove the screw and then pull the handle straight off.
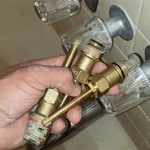
Step 3: Disconnect the Water Supply Lines
Underneath the faucet, you will see two water supply lines. One line will be connected to the hot water supply and the other to the cold water supply. Use an adjustable wrench to disconnect the water supply lines. Be careful not to damage the lines.
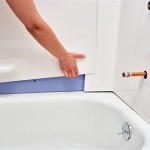
Step 4: Remove the Faucet Base
The faucet base is the part of the faucet that is mounted to the bathtub. It is usually held in place by four screws. Use a screwdriver to remove the screws and then carefully lift the faucet base off of the bathtub.
Step 5: Clean the Mounting Surface
Once the faucet base is removed, clean the mounting surface of the bathtub. Remove any old plumber's putty or sealant. This will help to ensure that the new faucet is properly sealed.
Step 6: Install the New Faucet
Apply a bead of plumber's putty around the base of the new faucet. Then, carefully place the faucet base on the bathtub and tighten the screws. Be sure to tighten the screws evenly to avoid damaging the faucet.
Step 7: Reconnect the Water Supply Lines
Next, reconnect the water supply lines to the faucet. Hand-tighten the nuts and then use an adjustable wrench to tighten them further. Be sure not to overtighten the nuts, as this could damage the lines.
Step 8: Reinstall the Faucet Handles
Finally, reinstall the faucet handles. Align the handles with the hot and cold water lines and then push them into place. Tighten the screws to secure the handles.
Step 9: Turn On the Water Supply
Once the new faucet is installed, turn on the water supply and check for leaks. If there are any leaks, tighten the nuts on the water supply lines further.

3 Handle Shower Tub Faucet Repair Replace Diverter

Install 3 Handle Shower Faucet

Replacing A Tub Faucet Bathtub Spout Replacement

Install 3 Handle Shower Faucet

3 Ways To Remove A Tub Faucet Wikihow

How To Fix A Leaking Bathtub Faucet Diy Family Handyman

How To Remove Tub Spout Without Set Bostingner

How To Change A Bathtub Faucet 14 Steps With Pictures Wikihow

How To Change A Bathtub Faucet 14 Steps With Pictures Wikihow

How To Fix A Leaking Pfister Shower Valve