How to Remove and Replace a Bathtub Faucet
Replacing a bathtub faucet is a plumbing task that most homeowners can handle with a few tools and some basic knowledge. Here's a step-by-step guide to help you through the process.
Tools You'll Need:
- Adjustable wrench or basin wrench
- Phillips head screwdriver or flathead screwdriver
- Pliers
- Caulk gun
- Teflon tape or plumber's putty
- Replacement faucet and handles
Step 1: Shut Off Water Supply
Before starting any plumbing work, it's crucial to turn off the water supply to the bathtub. Locate the shutoff valves under the sink or in the basement and turn them clockwise to the off position.
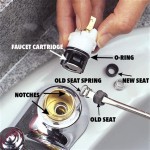
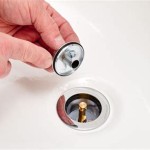
Step 2: Remove Old Faucet
Use an adjustable wrench or basin wrench to loosen the nuts that secure the faucet handles. Once the handles are removed, use a Phillips head screwdriver or flathead screwdriver to remove the mounting screws. Grip the faucet body with pliers and rotate it counterclockwise to detach it from the bathtub.
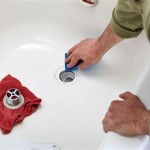
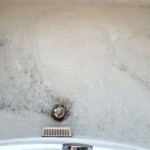
Step 3: Clean Faucet Base
Once the faucet is removed, clean the surface of the bathtub where it was mounted. Remove any old caulk or debris.
Step 4: Apply Plumber's Putty
If your new faucet doesn't come with a base plate, you may need to apply plumber's putty to create a watertight seal. Roll a rope of putty into a circle and place it around the base of the new faucet.
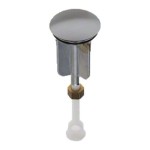
Step 5: Install New Faucet
Insert the new faucet into the mounting hole and tighten the mounting screws. Position the faucet so that the handles are facing the desired direction.
Step 6: Connect Water Lines
Locate the water supply lines and connect them to the corresponding ports on the faucet. Use Teflon tape or plumber's putty to create a watertight seal on the connections.
Step 7: Install Handles
Slide the faucet handles onto the stems and tighten the set screws to secure them.
Step 8: Restore Water Supply
Turn the shutoff valves back on to restore water supply to the bathtub.
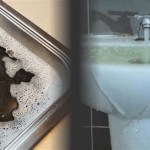
Step 9: Check for Leaks
Turn on the water and check for any leaks at the faucet base or the connections. If you find any leaks, tighten the nuts or apply additional Teflon tape or plumber's putty as needed.
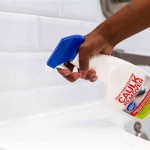
Step 10: Caulk Around Faucet Base
Once you're satisfied that there are no leaks, apply a bead of caulk around the base of the faucet to prevent water from seeping into the cracks.

Replacing A Tub Faucet Bathtub Spout Replacement

How To Fix A Leaking Bathtub Faucet Diy Family Handyman

How To Replace A Bathtub Faucet

Bathtub Spout With Diverter Replacement Fix Leaking Tub Jonny Diy

How To Change A Bathtub Faucet 14 Steps With Pictures Wikihow

How To Replace A Tub Spout

How To Change A Bathtub Faucet 14 Steps With Pictures Wikihow

Plumbing How To Replace A Jacuzzi Bathtub Faucet Home Improvement Stack Exchange

How To Fix A Leaking Bathtub Faucet Diy Family Handyman

How To Replace A Bathtub Spout
Related Posts