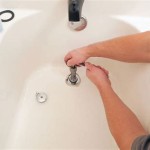
Repairing a Leaky Bathtub Faucet Single Handle: A Comprehensive Guide
A leaky bathtub faucet single handle can be a frustrating and costly issue. However, repairing it is a task that can be easily accomplished with the right tools and some basic knowledge. This article will provide a step-by-step guide on how to repair a leaky bathtub faucet single handle, ensuring that your bathroom remains dry and your water bills stay low.
Diagnosing the Leak
Before starting the repair, it is essential to identify the source of the leak. Here are some common causes of a leaky single-handle bathtub faucet:
- Worn or damaged cartridge
- Loose handle
- Cracked or broken seals
- Faulty aerator
To determine the source of the leak, you can:
- Check the handle: If the handle is loose or wobbly, it may indicate a loose cartridge or handle set.
- Examine the aerator: A clogged or damaged aerator can cause the water to spray or leak.
- Remove the faucet handle: Once the handle is removed, you can check the cartridge and seals for damage or wear.
Tools and Materials Required
Once you have diagnosed the leak, gather the necessary tools and materials for the repair:
- Adjustable wrench
- Allen wrench or hex key
- Phillips head screwdriver
- New cartridge or handle set (if needed)
- Plumber's tape
- Replacement seals (if needed)
Step-by-Step Repair Instructions
Follow these steps to repair the leaky bathtub faucet single handle:
- Turn off the water supply: Locate the water supply valves beneath the sink and turn off both the hot and cold water valves.
- Remove the faucet handle: Using an Allen wrench or hex key, loosen and remove the screw holding the handle in place. Then, gently pull the handle straight up to remove it.
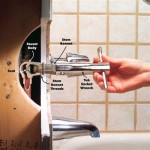
- Remove the cartridge: Once the handle is removed, you will see the cartridge. Use an adjustable wrench to loosen and remove the cartridge from the faucet body.
- Inspect the cartridge and seals: Examine the cartridge and the seals for any signs of damage or wear. If the cartridge is damaged, it will need to be replaced.
- Clean the faucet body: Before installing the new cartridge, clean the faucet body using a cloth and a mild cleaning solution.
- Install the new cartridge: Wrap a few layers of plumber's tape around the threads of the new cartridge. Then, insert the cartridge into the faucet body and tighten it using an adjustable wrench.
- Reinstall the handle: Slide the handle back onto the faucet body and tighten the screw using an Allen wrench or hex key.
- Turn on the water supply: Slowly turn on the water supply valves and check for any leaks. If there are no leaks, the repair is complete.
Additional Tips
Here are some additional tips to ensure a successful repair:
- If you are replacing the cartridge, make sure to get the correct type and size for your faucet.
- Do not overtighten any of the components during the repair.
- If the leak persists after the repair, contact a licensed plumber for assistance.
By following these instructions, you can effectively repair a leaky bathtub faucet single handle, restoring it to a fully functional state. This will save you money on water bills and prevent water damage to your bathroom.

How To Replace A Moen Cartridge And Fix Leaky Bathtub Faucet It Tutorials

How To Fix A Leaking Bathtub Faucet Diy Family Handyman

How To Fix A Leaking Single Handle Bathtub Faucet Quick And Easy

Repairing A Leaky Single Handle Tub Shower Ball Type Faucet

How To Fix A Leaky Bathtub Faucet 6 Ways Stop Drips

How To Fix A Leaking Bathtub Faucet The Home Depot

Fix A Leaky Delta Single Handle Shower Faucet For Under 2

How To Fix A Leaking Bathtub Faucet Diy Family Handyman

How To Fix A Leaking Bathtub Faucet The Home Depot

How To Fix A Leaking Bathtub Faucet The Home Depot

