Home Depot Bathtub Surround Installation: A Comprehensive Guide
A bathtub surround serves as an essential component of bathroom design, providing both aesthetic appeal and functional protection against water damage. Opting for a Home Depot bathtub surround installation can be a practical solution for homeowners seeking to upgrade their bathrooms efficiently and affordably. Home Depot offers a variety of surrounds in different materials, styles, and sizes, often coupled with professional installation services. This article outlines the key considerations, preparation steps, the installation process itself, and post-installation care involved in a Home Depot bathtub surround installation project.
Understanding the options available at Home Depot is the first crucial step. Surrounds are typically made from materials like acrylic, fiberglass, composite, or tile. Acrylic and fiberglass are popular choices due to their durability, ease of cleaning, and resistance to mold and mildew. Composite surrounds often mimic the look of natural stone or tile but are lighter and easier to install. Tile surrounds offer a classic and customizable look, but require more extensive installation and maintenance. Each material presents its own set of advantages and disadvantages concerning cost, durability, and aesthetic appeal.
Beyond the material, homeowners must also consider the style and dimensions of the surround. Home Depot offers surrounds in a range of styles, from simple and modern to more ornate and traditional. The dimensions of the surround must accurately match the existing bathtub or shower base. Standard bathtub surround kits typically consist of three to five panels, designed to cover the walls surrounding the tub. Ensuring correct measurements is paramount to avoid gaps, overlaps, or the need for extensive modifications during installation. Home Depot associates can assist in determining the appropriate size and style based on the homeowner's specific needs and bathroom dimensions.
Key Considerations Before Installation
Before initiating a Home Depot bathtub surround installation, several critical considerations must be addressed to ensure a successful outcome. These preparatory steps involve assessing the existing bathroom environment, selecting the appropriate surround, and preparing the installation site.
1. Evaluating the Existing Bathroom: The first step involves a thorough assessment of the existing bathroom. This includes checking the condition of the existing walls surrounding the bathtub. Are they plumb, square, and free from moisture damage? Any existing mold or mildew must be addressed before installing the new surround. The condition of the wall studs and plumbing should also be assessed. If there are signs of water damage or structural issues, these must be repaired before proceeding. The existing bathtub itself should also be inspected for any damages that might affect the installation process. In some cases, replacing the bathtub and surround concurrently might be a more efficient and cost-effective solution.
2. Selecting the Right Surround: Choosing the right bathtub surround from Home Depot involves several factors. The material of the surround should be selected based on the homeowner's preferences, budget, and desired level of maintenance. Acrylic and fiberglass surrounds are typically more affordable and easier to maintain than tile or composite surrounds. The style and color of the surround should complement the existing bathroom décor. The dimensions of the surround must be carefully measured to ensure a proper fit. Home Depot offers various sizes and configurations, including surrounds designed for alcove tubs, corner tubs, and shower stalls. Consulting with a Home Depot associate can help homeowners navigate the numerous options and select the most suitable surround for their specific needs.
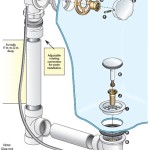
3. Preparing the Installation Site: Proper preparation of the installation site is crucial for a successful surround installation. This involves removing the old surround or wall covering, cleaning the exposed wall surfaces, and ensuring that the walls are level and square. Any loose or damaged drywall should be repaired or replaced. A moisture barrier, such as a polyethylene film, should be installed behind the surround to prevent water damage to the wall studs. The bathtub should be clean and free from debris. If necessary, the drain and overflow assembly should be inspected and repaired or replaced. All necessary tools and materials, including adhesive, caulk, shims, and measuring tools, should be gathered before starting the installation process.
The Installation Process: A Step-by-Step Guide
The installation process for a Home Depot bathtub surround typically involves several distinct stages, each of which requires careful attention to detail to ensure a secure and watertight seal. This section details the general steps involved, though specific instructions may vary depending on the specific surround model and manufacturer recommendations.
1. Dry Fitting the Panels: Before applying any adhesive, it is essential to dry fit the surround panels to ensure a proper fit. This involves positioning each panel against the wall and checking for any gaps or overlaps. Shims can be used to level the panels and ensure that they are properly aligned. If necessary, the panels can be trimmed or adjusted to fit the space. This dry fitting process allows for correction of any issues before the adhesive is applied, saving time and preventing potential errors.
2. Applying Adhesive: Once the panels have been dry fitted and any necessary adjustments have been made, the adhesive can be applied. The type of adhesive used will depend on the material of the surround and the manufacturer's recommendations. Construction adhesive specifically designed for bathroom applications is typically recommended. The adhesive should be applied to the back of the panels in a consistent and uniform manner. Avoid applying too much adhesive, as this can create a messy and uneven surface. The instructions on the adhesive container should be carefully followed to ensure proper bonding.
3. Installing the Panels: After the adhesive has been applied, the panels should be carefully positioned against the wall. Press each panel firmly against the wall to ensure good contact with the adhesive. Use shims to maintain the panels in the correct position while the adhesive cures. Check the panels for plumb and level using a level. Remove any excess adhesive with a damp cloth. Allow the adhesive to cure completely according to the manufacturer's instructions. This usually takes 24 to 48 hours.
4. Caulking the Seams: Once the adhesive has cured, the seams between the panels and the bathtub should be caulked to create a watertight seal. Use a high-quality mildew-resistant caulk specifically designed for bathroom applications. Apply the caulk in a consistent and uniform bead along all seams. Smooth the caulk with a finger or a caulking tool to create a clean and professional finish. Remove any excess caulk with a damp cloth. Allow the caulk to cure completely according to the manufacturer's instructions. This usually takes 24 hours.
Post-Installation Care and Maintenance
Proper post-installation care and maintenance are essential to preserving the longevity and appearance of a Home Depot bathtub surround. Regular cleaning and prompt attention to any signs of damage can prevent costly repairs and extend the lifespan of the surround.
1. Regular Cleaning: Regular cleaning is crucial for preventing the buildup of soap scum, mildew, and other contaminants. Clean the surround regularly with a mild detergent and a soft cloth or sponge. Avoid using abrasive cleaners or scouring pads, as these can scratch or damage the surface. For stubborn stains, use a specialized bathroom cleaner designed for the specific material of the surround. Rinse thoroughly with clean water and dry with a clean towel. Regular cleaning will help maintain the surround's appearance and prevent the growth of mold and mildew.
2. Maintaining the Caulk Seal: The caulk seal around the surround is critical for preventing water damage. Inspect the caulk regularly for any signs of cracking, peeling, or discoloration. If any damage is detected, remove the old caulk and re-caulk the seams. Before applying new caulk, clean the area thoroughly and allow it to dry completely. Use a high-quality mildew-resistant caulk specifically designed for bathroom applications. Proper maintenance of the caulk seal will help prevent water damage to the walls and subfloor.
3. Addressing Minor Damage: Minor scratches or chips can occur on the surface of the surround over time. These can often be repaired using a repair kit specifically designed for the material of the surround. Follow the instructions on the repair kit carefully to ensure a proper repair. For more significant damage, such as cracks or holes, professional repair may be necessary. Prompt attention to any damage will prevent it from worsening and potentially causing water damage. Properly maintaining and addressing damage can significantly extend the life of the Home Depot bathtub surround.

Delta Distinction 60 In W X H Three Piece Glue Up Tub Surrounds High Gloss White 39094 Hd The Home Depot

Flexstone Elite 32 In X 60 9 Piece Easy Up Adhesive Tub Surround White Tsk60326031wh The Home Depot Bathtub Walls Shower Wall

Delta Sifit 60 In W X 58 H Five Piece Glue Up Tub Surrounds White 40194 The Home Depot

Delta Distinction 60 In W X H Three Piece Glue Up Tub Surrounds High Gloss White 39094 Hd The Home Depot

How To Install A Glue Up Shower Enclosure The Home Depot

American Standard Ovation 32 In X 60 59 5 Piece Glue Up Alcove Bath Wall Set Silver Celestial 2968bwt60 366 The Home Depot

How To Install A Shower Surround The Home Depot

How To Install A Shower Surround The Home Depot

Flexstone Royale 36 In X 60 80 11 Piece Easy Up Adhesive Alcove Bathtub Shower Wall Surround Calypso Ssk60367831cp The Home Depot

Flexstone Elite 32 In X 60 9 Piece Easy Up Adhesive Tub Surround Calabria Tsk60326031ca The Home Depot


