Essential Aspects of Grohe Bathtub Faucet Handle Removal
Replacing a bathroom faucet handle is a common home improvement task that can be accomplished with the right tools and a little know-how. If you're dealing with a Grohe bathtub faucet, here's a step-by-step guide to help you remove the handle safely and efficiently:
Tools Required:
- Phillips screwdriver
- Allen wrench (hex key)
- Pliers (optional)
Steps:
1. Turn Off Water Supply:
Before you begin, ensure that the water supply to the faucet is turned off. Locate the water shut-off valves underneath the sink or behind the bathroom wall and close them tightly.
2. Remove the Cap:
Most Grohe bathtub faucet handles have a small cap located on the top or side of the handle. Use a Phillips screwdriver to unscrew this cap and expose the screw beneath it.
3. Remove the Screw:
Once the cap is removed, use an Allen wrench to loosen the screw underneath it. Do not remove the screw completely, just loosen it enough to release the handle.
4. Pull Out the Handle:
With the screw loosened, gently pull the handle straight towards you to remove it from the faucet body. If the handle is stuck, you can use pliers to grip it and pull it out with more force.
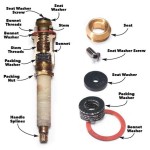
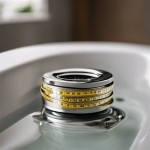
5. Remove the Cartridge (Optional):
Once the handle is removed, you may have access to the cartridge, which controls the flow and temperature of water. If the cartridge needs to be replaced, use pliers to grasp it and pull it straight out of the faucet body.
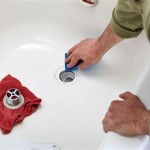
6. Clean the Faucet Body (Optional):
While the handle is off, take this opportunity to clean the faucet body and any visible parts of the cartridge. Use a soft cloth or sponge with warm water and a mild cleaning agent.
7. Reassemble the Faucet:
To reassemble the faucet, simply reverse the steps above. Insert the cartridge (if removed), place the handle back on the faucet body, and tighten the screw. Replace the cap and turn on the water supply to check for leaks.
Tips:
- If you encounter any difficulties, do not force anything. Refer to the manufacturer's instructions or seek professional assistance.
- Replace the handle and any other components with genuine Grohe parts to ensure proper function and warranty coverage.
- Regular maintenance and cleaning can extend the life of your Grohe bathtub faucet and prevent future issues.

Grohe Shower Thermostatic Mixer Valve Replacement

How To Fix A Leaking Grohe Shower Valve

Grohe Shower Faucet Handle Removal Sincovaga Com Br

My Grohe Ladylux Faucet Leaks And I Can T Remove The Lever Doityourself Com Community Forums

Grohe Shower Valve Handles Keep Falling Off Lets Get To Fixin

Old Shower Valve Identification Easy Diy Guide Hunker

Help Removing Grohe Grohmix Faucet Cartridge Terry Love Plumbing Remodel Diy Professional Forum

How To Fix A Leaking Grohe Shower Valve

Plumbing How Can I Remove This Thermostatic Mixing Shower Faceplate Home Improvement Stack Exchange