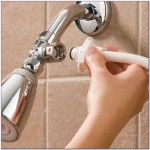
How to Fix a Leaky Bathtub Faucet With Two Handles
A leaky bathtub faucet is a common household problem that can lead to wasted water, increased water bills, and even damage to surrounding fixtures if left unattended. Bathtub faucets with two handles, one for hot water and one for cold, are a prevalent style found in many homes. Understanding the components of these faucets and the potential causes of leaks is essential for effective repair. This article provides a step-by-step guide to diagnosing and repairing a leaky two-handle bathtub faucet, enabling homeowners to address the issue efficiently and prevent further complications.
Before beginning any repair work, it is crucial to identify the type of faucet mechanism involved. Two-handle faucets typically utilize one of three primary valve types: compression valves, ball valves, or cartridge valves. Compression valves are the oldest and simplest design, relying on a rubber washer that presses against the valve seat to shut off the water flow. Ball valves use a slotted ball that rotates to control the flow of water. Cartridge valves employ a cylindrical cartridge containing internal seals that move to regulate the water. Identifying the valve type will determine the specific repair procedures and necessary replacement parts.
Safety is of paramount importance when undertaking plumbing repairs. The first step is always to shut off the water supply to the bathtub faucet. This is usually accomplished by turning off the shut-off valves located under the sink or near the water meter. If individual shut-off valves are not present, the main water supply to the entire house will need to be turned off. Once the water supply is shut off, open both faucet handles to relieve any remaining pressure in the pipes. Place a stopper in the drain to prevent any small parts from falling into the drain. Gather the necessary tools, which may include a flathead screwdriver, a Phillips head screwdriver, an adjustable wrench, pliers, penetrating oil, and replacement parts such as washers, O-rings, or cartridges.
Diagnosing the Cause of the Leak
Pinpointing the source of the leak is crucial for a successful repair. Carefully examine the faucet handles, spout, and escutcheons (the decorative plates around the handles) for any signs of water leakage. The location of the leak can often provide clues about the underlying problem. For example, a leak originating from around the handle typically indicates a worn O-ring or packing nut. A leak from the spout often suggests a problem with the valve seat or the cartridge/washer assembly. A consistent drip, even when the handles are tightly shut off, often points to a worn washer or a damaged valve seat on a compression-style faucet. For cartridge-style faucets, a constant drip usually signifies a damaged cartridge.
Observe the behavior of the leak. Does the leak occur only when one handle is turned on, or does it persist even when both handles are off? Does the leak worsen when the water pressure is higher? These observations can help narrow down the potential causes. If the leak is intermittent or only occurs at certain times of the day, it could be related to fluctuations in water pressure or temperature. Identifying the specific conditions under which the leak occurs can provide valuable insights into the nature of the problem.
If the faucet is producing discolored water or making unusual noises, these symptoms can also indicate specific problems. Discolored water could be a sign of corrosion within the pipes or faucet components. Unusual noises, such as whistling or banging, could indicate loose parts or mineral buildup. By carefully observing all the symptoms associated with the leak, a more accurate diagnosis can be made.
Repairing a Compression-Style Faucet
Compression faucets are fairly straightforward to repair. After shutting off the water supply and removing the handle (typically held in place by a screw), the next step is to remove the packing nut. This nut holds the stem assembly in place. Use an adjustable wrench to loosen and remove the packing nut. Be careful not to damage the nut or surrounding components. Once the packing nut is removed, the entire stem assembly can be pulled out of the faucet body.
Inspect the stem assembly for any signs of wear or damage. The rubber washer at the end of the stem is the most common culprit for leaks in compression faucets. Examine the washer for cracks, tears, or deformation. If the washer is worn or damaged, replace it with a new washer of the same size and type. Also, inspect the O-rings on the stem assembly. These O-rings create a seal between the stem and the faucet body. If the O-rings are cracked or deteriorated, replace them as well.
The valve seat, located inside the faucet body, is another potential source of leaks. The valve seat is the surface against which the rubber washer presses to shut off the water flow. Over time, the valve seat can become corroded or damaged, preventing a tight seal. Inspect the valve seat for any signs of damage, such as pitting or corrosion. If the valve seat is damaged, it can be repaired using a valve seat wrench or a valve seat grinding tool. A valve seat wrench is used to remove and replace the valve seat, while a valve seat grinding tool is used to smooth out any imperfections on the surface of the valve seat. If the valve seat is severely damaged, it may be necessary to replace the entire faucet.
Before reassembling the faucet, clean all the parts thoroughly. Remove any mineral deposits or corrosion using a wire brush or a cleaning solution. Apply a small amount of plumber's grease to the threads of the stem assembly and the packing nut. This will make it easier to assemble the faucet and will also help to prevent corrosion. Reassemble the faucet in the reverse order of disassembly. Tighten the packing nut securely, but be careful not to overtighten it. Overtightening the packing nut can damage the stem assembly or the faucet body.
Repairing a Cartridge-Style Faucet
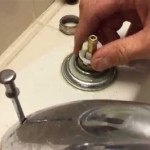
Cartridge faucets often leak due to a worn or damaged cartridge. To repair a cartridge faucet, first shut off the water supply and remove the handle. The handle is typically held in place by a set screw, which may be hidden under a decorative cap. Use a small screwdriver or Allen wrench to remove the set screw. Once the set screw is removed, the handle can be pulled off the faucet.
After removing the handle, the next step is to remove the retaining clip or nut that holds the cartridge in place. The retaining clip is usually a small metal clip that slides into a slot in the faucet body. Use pliers to carefully remove the retaining clip. The retaining nut is a threaded nut that screws onto the faucet body. Use an adjustable wrench to loosen and remove the retaining nut.
Once the retaining clip or nut is removed, the cartridge can be pulled out of the faucet body. The cartridge may be difficult to remove if it is corroded or stuck. If the cartridge is stuck, use pliers or a cartridge puller to gently twist and pull the cartridge out of the faucet. Be careful not to damage the faucet body or the cartridge.
Inspect the cartridge for any signs of wear or damage. The cartridge typically contains O-rings and seals that can wear out over time. If the cartridge is damaged, replace it with a new cartridge of the same type and size. Make sure to purchase a cartridge that is specifically designed for your faucet model. Before installing the new cartridge, clean the inside of the faucet body thoroughly. Remove any mineral deposits or corrosion using a wire brush or a cleaning solution. Apply a small amount of plumber's grease to the O-rings on the new cartridge. This will help to create a tight seal and will also make it easier to install the cartridge.
Insert the new cartridge into the faucet body. Make sure the cartridge is properly aligned and seated. Reinstall the retaining clip or nut. Tighten the retaining nut securely, but be careful not to overtighten it. Reinstall the handle and the set screw. Turn on the water supply and test the faucet for leaks.
If the faucet continues to leak after replacing the cartridge, there may be a problem with the valve seat. The valve seat is the surface against which the cartridge seals to shut off the water flow. Over time, the valve seat can become corroded or damaged, preventing a tight seal. Inspect the valve seat for any signs of damage, such as pitting or corrosion. If the valve seat is damaged, it may be necessary to replace the entire faucet.
Essential Tips for Successful Faucet Repair
Proper preparation is essential for a successful faucet repair. Before starting any work, gather all the necessary tools and replacement parts. Having the right tools and parts on hand will save time and frustration. It is also helpful to take photos of the faucet before disassembly. These photos can serve as a reference during reassembly and can help to ensure that all the parts are put back in the correct order.
When removing old parts, be careful not to damage the faucet body or surrounding components. Use penetrating oil to loosen any corroded or stuck parts. Apply the penetrating oil liberally and allow it to soak for several minutes before attempting to remove the parts. Avoid using excessive force, as this can damage the faucet or strip the threads. If a part is particularly difficult to remove, consider seeking assistance from a qualified plumber.
When installing new parts, make sure they are properly aligned and seated. Use plumber's grease to lubricate the threads and O-rings. This will help to create a tight seal and will also make it easier to assemble the faucet. Tighten all connections securely, but be careful not to overtighten them. Overtightening can damage the parts or strip the threads. After reassembling the faucet, turn on the water supply slowly and check for leaks. If any leaks are detected, tighten the connections further or replace any damaged parts.

How To Fix A Leaking Bathtub Faucet Diy Family Handyman

How To Fix A Leaking Bathtub Faucet Diy Family Handyman

How To Fix A Leaky Bathtub Faucet 6 Ways Stop Drips

Repairing A Leaky Two Three Handle Tub Shower Faucet

How To Fix Leaky Bathroom Faucet Kohler Two Handle

How To Fix A Leaking Bathtub Faucet The Home Depot

How To Fix A Leaky Bathtub Faucet Blue Collars

Fix A Leaky Tub Faucet With Two Handles

4 Easy Ways To Fix A Leaky Bathroom Sink Faucet With Double Handle

How To Fix A Leaking Bathtub Faucet The Home Depot
Related Posts

