How To Refinish A Bathtub With Rustoleum Tub And Tile Kit
Refinishing a bathtub can significantly improve the aesthetics and functionality of a bathroom without incurring the high costs associated with a full replacement. The Rustoleum Tub and Tile Refinishing Kit offers a cost-effective and relatively simple solution for restoring the finish of aged, chipped, or otherwise damaged bathtubs. This article provides a comprehensive guide on how to effectively utilize the Rustoleum Tub and Tile kit, ensuring a durable and professional-looking result. Prior to commencing, assess the condition of the bathtub. Severe structural damage may necessitate professional intervention or outright replacement.
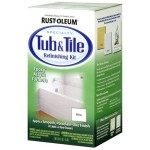
The Rustoleum Tub and Tile Refinishing Kit is an epoxy acrylic coating designed to bond to porcelain, ceramic, and fiberglass surfaces. The kit typically includes a two-part epoxy acrylic formula: a base coat and an activator. When mixed, these components create a hard, durable finish that resists water damage and stains. Ensure the kit is appropriate for the bathtub material. While generally effective on porcelain, ceramic, and fiberglass, certain types of acrylic bathtubs may require alternative refinishing products.
Key Point 1: Preparation is Paramount
Surface preparation is arguably the most critical aspect of bathtub refinishing. A poorly prepared surface will compromise the adhesion of the coating, leading to premature peeling, chipping, and an overall unsatisfactory result. The process involves several key steps, including cleaning, etching, and masking.
Begin with a thorough cleaning. Remove all soap scum, mildew, and mineral deposits from the bathtub surface. Use a dedicated bathroom cleaner designed to dissolve these types of residues. For stubborn stains, a pumice stone or specialized cleaning paste may be necessary. Rinse the surface thoroughly with clean water, ensuring all cleaning solutions are completely removed. Any remaining residue can interfere with the bonding process of the refinishing coating.
After cleaning, etching is necessary to create a slightly rough surface that promotes adhesion. The Rustoleum Tub and Tile kit typically includes an etching solution or recommends specific etching products. Carefully follow the instructions provided with the etching solution. Generally, the solution is applied to the bathtub surface and allowed to sit for a specified period, usually a few minutes. Wear appropriate protective gear, including gloves and eye protection, when handling etching solutions, as they can be corrosive. After the etching period, thoroughly rinse the bathtub with clean water to remove all traces of the etching solution. It is crucial to ensure the surface is completely free of any chemicals before proceeding.
Once the bathtub is clean and etched, allow it to dry completely. Use a clean, lint-free cloth to wipe down the surface and remove any remaining moisture. A damp surface will prevent the coating from adhering properly. To expedite the drying process, a fan can be used to circulate air in the bathroom. Be sure to prevent dust from settling on the drying surface.
Masking is the final step in surface preparation. Use painter's tape and plastic sheeting or masking paper to protect surrounding areas, such as tiles, fixtures, and the bathroom floor. Pay close attention to the edges of the bathtub to ensure a clean and crisp line. Overlap the tape slightly onto the bathtub surface to prevent the coating from seeping underneath. Carefully smooth out the tape to ensure a secure seal. Proper masking will prevent overspray and ensure a professional-looking finish.
Key Point 2: Mixing and Application Techniques
The Rustoleum Tub and Tile Refinishing Kit consists of two components that must be mixed accurately to achieve the desired results. The mixing ratio is crucial for proper curing and adhesion. Carefully read and follow the instructions provided with the kit to determine the correct proportions of the base coat and activator. Using an incorrect ratio can result in a coating that doesn't cure properly or lacks durability.
Pour the required amount of base coat into a clean mixing container. Then, add the specified amount of activator. Use a stir stick to thoroughly mix the two components together. Stir the mixture for the recommended time, typically several minutes, ensuring that the activator is fully incorporated into the base coat. Avoid stirring too vigorously, as this can introduce air bubbles into the mixture, which can result in an uneven finish. The mixed coating has a limited pot life, which means it will start to harden after a certain period. Prepare only as much coating as can be used within the recommended time frame, typically a few hours.
The Rustoleum Tub and Tile Refinishing Kit can be applied using a brush, roller, or spray gun. A brush is suitable for small touch-ups or tight areas, while a roller is more efficient for larger surfaces. A spray gun provides the most even and professional-looking finish, but it requires proper equipment and technique. Regardless of the application method chosen, apply the coating in thin, even coats. Avoid applying too much coating at once, as this can lead to runs, drips, and an uneven finish.
When using a brush or roller, apply the coating in smooth, overlapping strokes. Maintain a wet edge to prevent lap marks. Work in small sections at a time, ensuring that each section is evenly coated. Avoid pressing too hard on the brush or roller, as this can create brush strokes or roller marks. Allow each coat to dry completely before applying the next coat. The drying time will vary depending on the ambient temperature and humidity, but it is typically several hours. Follow the manufacturer's instructions for recommended drying times between coats.
If using a spray gun, thin the coating according to the manufacturer's instructions. Use a steady, even motion to apply the coating, overlapping each pass by about 50%. Maintain a consistent distance between the spray gun and the bathtub surface. Avoid spraying too close or too far away, as this can result in an uneven finish. Apply several thin coats, allowing each coat to dry completely before applying the next. Wear a respirator when spraying to protect from inhaling fumes.
After applying the final coat, carefully inspect the surface for any imperfections, such as runs, drips, or brush strokes. If any imperfections are found, they can be lightly sanded down with fine-grit sandpaper after the coating has fully cured. However, sanding can compromise the finish, so this should be done sparingly and with caution.
Key Point 3: Curing and Maintenance
The curing process is essential for achieving a durable and long-lasting finish. The coating needs sufficient time to harden and bond properly to the bathtub surface. Follow the manufacturer's instructions for the recommended curing time, which is typically 24 to 72 hours. Avoid using the bathtub during the curing period. Even if the surface feels dry to the touch, the coating may not be fully cured underneath, and using the bathtub prematurely can damage the finish.
Maintain adequate ventilation in the bathroom during the curing process to help the coating dry properly. Open windows and doors or use a fan to circulate air. Avoid exposing the freshly refinished bathtub to excessive moisture or humidity during the curing period. High humidity can slow down the curing process and affect the final finish.
Once the coating has fully cured, remove the masking tape and plastic sheeting. Carefully peel off the tape, avoiding any sudden movements that could damage the finish. If any coating has seeped underneath the tape, use a razor blade or utility knife to carefully score the edge of the tape before peeling it off. Clean up any remaining debris or adhesive residue with a clean cloth and mild detergent.
To maintain the finish of the refinished bathtub, use non-abrasive cleaning products. Avoid using harsh chemicals, scouring pads, or abrasive cleaners, as these can scratch and dull the surface. Regularly clean the bathtub with a mild detergent and water. Rinse thoroughly with clean water and dry with a soft cloth. Avoid allowing water to pool on the surface, as this can lead to water spots and stains. Repair any chips or scratches promptly to prevent further damage.
Consider using a bathtub mat or slip-resistant strips to prevent slipping and protect the finish from scratches. Avoid placing heavy objects on the bathtub surface, as this can cause dents or cracks. With proper care and maintenance, a refinished bathtub can last for several years, providing a cost-effective alternative to replacement.
The successful application of the Rustoleum Tub and Tile Refinishing Kit hinges on meticulous preparation, precise mixing and application, and careful curing. Each step contributes to the overall durability and aesthetic appeal of the refinished bathtub. By adhering to these guidelines, satisfactory results can be achieved, extending the lifespan and enhancing the appearance of the bathtub.

How To Paint A Tub With Rustoleum What Not Do

Rust Oleum Tub And Tile Refinishing Kit Review Ask Anna

How To Paint A Tub With Rustoleum What Not Do

Diy Painted Bathtub Follow Up Your Questions Answered Addicted 2 Decorating

How To Refinish A Bathtub With Rustoleum Tub And Tile Kit

To Spray Or Not A Bathtub That Is The Caldwell Project

Yes You Can Paint Your Bathtub And Tile Here S How Toolbox Divas

My Experience Refinishing A Bathtub With Rust Oleum Tub And Tile Simple Practical Beautiful

Painting A Bathtub With Rust Oleum Tub And Tile

How To Paint A Tub With Rustoleum What Not Do
Related Posts