How To Fix Bathtub Paint Chip
Bathtub paint chips, while seemingly minor blemishes, can detract from the overall aesthetic appeal of a bathroom and, more importantly, expose the substrate to potential water damage. Ignoring these chips can lead to rust formation on cast iron or steel tubs, and eventual delamination of the surrounding paint. Therefore, addressing these issues promptly is crucial for maintaining the integrity and longevity of the bathtub. This article provides a detailed guide on how to effectively repair bathtub paint chips, ensuring a professional and durable finish.
Assessing the Damage and Gathering Materials
Before commencing any repair work, a thorough assessment of the paint chip is necessary. This involves identifying the size and depth of the chip, as well as the type of material the bathtub is made from. Common bathtub materials include cast iron, steel, acrylic, and fiberglass. The identification of the material is critical because it dictates the type of repair products that will be compatible and effective. For instance, epoxy-based repair kits are generally suitable for cast iron and steel, while acrylic repair kits are designed for acrylic bathtubs.
Once the material is identified and the damage assessed, the next step is to gather the necessary materials. Essential supplies include:
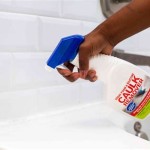
*Cleaning Supplies:
A household cleaner (e.g., dish soap) and a scrub brush are necessary for cleaning the damaged area. An abrasive cleaner, such as Comet or Bar Keepers Friend, can be used for removing stubborn stains or rust. *Sandpaper:
Various grits of sandpaper are needed for preparing the surface. Course-grit sandpaper (e.g., 80-grit) is used for removing loose paint and rust. Medium-grit sandpaper (e.g., 120-grit to 220-grit) is used for smoothing the edges of the chip. Fine-grit sandpaper (e.g., 320-grit to 400-grit) is used for feathering the repair area for a seamless blend. *Repair Kit:
A bathtub repair kit specifically designed for the bathtub material. These kits typically include epoxy or acrylic filler, hardener, color tint, and application tools. *Putty Knife or Spreader:
A small putty knife or spreader is required for applying the filler evenly and smoothly. *Painter's Tape:
Painter's tape is used to mask off the surrounding area, protecting it from accidental damage during the repair process. *Respirator/Mask:
A respirator or mask is crucial for protecting against inhaling potentially harmful fumes from the repair products. *Gloves:
Gloves protect the hands from chemicals and prevent the transfer of oils and dirt to the repair area. *Mixing Sticks/Container:
Small mixing sticks and a disposable container are used for mixing the filler and hardener. *Primer (Optional):
A primer can be used to improve the adhesion of the repair material to the substrate, particularly on metal surfaces. *Clear Coat (Optional):
A clear coat can add an extra layer of protection and enhance the durability of the repair.Preparing the Damaged Area
Proper surface preparation is paramount for achieving a successful and long-lasting repair. Inadequate preparation is a primary cause of premature failure of the repair, leading to chipping or peeling.
The first step is to thoroughly clean the damaged area. Use a household cleaner and scrub brush to remove any dirt, grime, soap scum, or mildew. For stubborn stains or rust, use an abrasive cleaner, but exercise caution to avoid scratching the surrounding paint. Rinse the area thoroughly with water and allow it to dry completely.
Once the area is clean and dry, begin sanding the damaged area. Start with coarse-grit sandpaper (e.g., 80-grit) to remove any loose paint, rust, or debris. Sand down to bare substrate if necessary. Be careful not to damage the surrounding paint. Next, use medium-grit sandpaper (e.g., 120-grit to 220-grit) to smooth the edges of the chip, creating a gradual transition between the damaged area and the surrounding paint. The objective is to eliminate any sharp edges that could cause the repair material to lift or crack. Finally, use fine-grit sandpaper (e.g., 320-grit to 400-grit) to feather the edges of the repair area, blending it seamlessly with the surrounding paint.
After sanding, thoroughly clean the area again to remove any sanding dust. Use a tack cloth or a damp cloth to ensure that the surface is completely dust-free. Dust particles can interfere with the adhesion of the repair material, leading to an uneven or weakened repair. Allow the area to dry completely before proceeding to the next step.
Apply painter's tape around the perimeter of the damaged area, masking off the surrounding paint. This will protect the surrounding surface from accidental damage during the application of the repair material and ensure a clean, professional-looking repair.
If the bathtub is made of metal (cast iron or steel), consider applying a thin layer of metal primer to the prepared area. The primer will improve the adhesion of the repair material to the metal substrate and prevent rust formation. Allow the primer to dry completely according to the manufacturer's instructions before proceeding.
Applying the Repair Material and Finishing
The application of the repair material requires precision and attention to detail. Follow the instructions provided with the bathtub repair kit carefully. Most kits involve mixing a filler with a hardener. The mixing ratio is critical for achieving the correct consistency and curing properties. Use the provided mixing sticks and a disposable container to ensure thorough mixing.
Apply the mixed filler to the prepared area using a putty knife or spreader. Apply the filler in thin, even layers, slightly overfilling the chip. This allows for subsequent sanding to create a flush surface. Avoid applying too much filler at once, as this can lead to air bubbles or uneven curing. Allow each layer to dry completely before applying the next layer, following the manufacturer's instructions for drying time.
Once the filler is completely dry, begin sanding the repair area to create a smooth, flush surface. Start with medium-grit sandpaper (e.g., 220-grit) to remove any excess filler and level the repair with the surrounding paint. Then, use fine-grit sandpaper (e.g., 320-grit to 400-grit) to further smooth the surface and blend the repair seamlessly with the surrounding paint. Be gentle and patient during the sanding process to avoid damaging the surrounding paint.
After sanding, thoroughly clean the repair area again to remove any sanding dust. Use a tack cloth or a damp cloth to ensure that the surface is completely dust-free. Allow the area to dry completely before proceeding to the next step.
The repair kit may include color tint that needs to be mixed with the filler to match the color of the bathtub. Carefully follow the instructions to achieve a good color match. If the color match is not perfect, consider purchasing a small amount of touch-up paint from a hardware store. Apply the touch-up paint to the repair area using a fine-tipped brush, blending it seamlessly with the surrounding paint.
For added protection and durability, consider applying a clear coat to the repair area. The clear coat will provide a protective layer against water, scratches, and stains. Apply the clear coat in thin, even layers, following the manufacturer's instructions for drying time. Allow the clear coat to dry completely before removing the painter's tape.
Once the clear coat is completely dry, carefully remove the painter's tape. Inspect the repair for any imperfections. If necessary, use a fine-grit sandpaper to touch up any rough edges or uneven areas. Clean the repaired area with a mild soap and water solution and allow it to dry completely.
Allow the repaired area to fully cure for the recommended time period, as specified by the manufacturer of the repair kit. This is typically 24-72 hours. During this time, avoid using the bathtub or exposing the repaired area to water. This will ensure that the repair material fully cures and achieves maximum strength and durability.
Regular cleaning and maintenance will help to prolong the life of the repair. Avoid using harsh abrasive cleaners that can damage the paint. Use a mild soap and water solution and a soft cloth to clean the bathtub regularly. Promptly address any new chips or scratches to prevent further damage and maintain the overall appearance of the bathtub.

Diy Bathtub Repair

Bathtub Chip Repair For Only 199 Happy Tubs

How To Fix Ling Bathtub Paint Design Swan

How To Repair A Chip In Bathtub Simple And Easy Diy Process Dp Tubs

Bathtub Chip Repair Porcelain Tub

Repairing Chipped Porcelain Bathtubs Us Bath S

How To Fix A Chipped Bathtub In Just Few Easy Steps

How To Fix A Chip In Bathtub With Rustoleum Tub And Tile Touch Up Paint

Diy Bathtub Repair How To Fix A Chipped Floor

Bathtub Chip Repair For Only 199 Happy Tubs