Delta Bathtub Faucet Repair: A Step-by-Step Guide
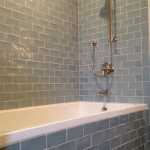
Delta bathtub faucets are known for their durability and reliability. However, even the best faucets can develop problems over time. If your Delta bathtub faucet is leaking, dripping, or not functioning properly, you can usually repair it yourself with a few simple tools and some basic plumbing knowledge. ## Tools and Materials You Will Need Before you begin, gather the following tools and materials: * Adjustable wrench * Allen wrench * Channel-lock pliers * Flathead screwdriver * Pliers * Replacement Delta bathtub faucet cartridge * Teflon tape * Rags * Bucket ## Step-by-Step Repair Guide ### 1. Turn Off the Water Supply Before you start any repairs, it is important to turn off the water supply to the faucet. There are usually two valves that control the water supply to the faucet: one for hot water and one for cold water. Find these valves and turn them clockwise to turn off the water. ### 2. Remove the Faucet Handle Once the water is turned off, you can remove the faucet handle. On most Delta faucets, the handle is held in place by a small setscrew. Use the Allen wrench to remove the setscrew. Once the setscrew is removed, you should be able to pull the handle straight off. ### 3. Remove the Cartridge Once the handle is removed, you will see the cartridge. The cartridge is a cylindrical-shaped part that controls the flow of water from the faucet. To remove the cartridge, use the channel-lock pliers to loosen the retaining nut. Once the retaining nut is loose, you should be able to pull the cartridge straight out. ### 4. Inspect the Cartridge Once you have removed the cartridge, inspect it for any damage. If the cartridge is cracked, worn, or damaged, it will need to be replaced. ### 5. Install the New Cartridge If the cartridge needs to be replaced, install the new cartridge in the faucet body. Make sure that the new cartridge is properly seated in the faucet body before tightening the retaining nut. ### 6. Reinstall the Faucet Handle Once the new cartridge is installed, you can reinstall the faucet handle. To do this, simply push the handle back onto the faucet body and tighten the setscrew. ### 7. Turn On the Water Supply Finally, turn on the water supply to the faucet and check for leaks. If there are no leaks, your faucet repair is complete! ## Tips for Preventing Bathtub Faucet Leaks Here are a few tips to help prevent bathtub faucet leaks: * Keep the faucet clean and free of debris. * Don't overtighten the faucet handle. * Replace the faucet cartridge every few years. * If you notice a leak, fix it immediately. By following these tips, you can help keep your Delta bathtub faucet in good working condition for years to come.
How To Repair A Delta Tub Shower Valve

Repairing A Leaky Delta Bath Or Shower Faucet Single Lever And Setting Temp

Old Delta Shower Faucet Repair Made Easy

My 1300 1400 Series Monitor Is Leaking From The Shower Head Or Spout When Handle Off What Do I Need

Fix The Leaky Delta Bathtub Faucet A Step By Leak Repair Guide Shower Handles

How To Repair A Delta Tub Shower Valve

How To Repair A Delta Tub Shower Valve

How To Replace A Delta Tub Or Shower Cartridge

Danco 1 91 In Replacement Cartridge For Delta Monitor Faucet 10347 The Home Depot

Delta Bathtub And Shower Valve Repair Parts