How to Fix a Bathtub Soap Holder
Bathtub soap holders, indispensable for keeping bathing essentials organized and accessible, are prone to various issues over time. These issues can range from loosening and detachment to cracking and discoloration. Addressing these problems promptly is crucial not only for maintaining the aesthetic appeal of the bathroom but also for preventing potential hazards such as falling soap bars or structural damage to the surrounding tiles. This article provides a comprehensive guide on diagnosing and repairing common bathtub soap holder problems, ensuring a safe and functional bathing experience.
Identifying Common Soap Holder Problems
Before commencing any repair work, accurate identification of the problem plaguing the soap holder is paramount. This allows for the selection of the most appropriate repair method and ensures the longevity of the fix. Several common issues frequently arise with bathtub soap holders:
Loose or Detached Soap Holder: This is perhaps the most prevalent issue. It often stems from degraded adhesive, corroded mounting hardware, or compromised grout lines. The soap holder may wobble, detach partially, or completely separate from the wall.
Cracked or Broken Soap Holder: Soap holders constructed from ceramic, plastic, or other brittle materials are susceptible to cracking or breaking, particularly under stress or impact. Cracks can weaken the structural integrity of the holder and create sharp edges, posing a safety risk.
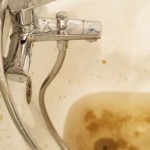
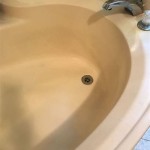
Discoloration and Staining: Prolonged exposure to moisture, soap residue, and cleaning agents can lead to discoloration and staining of the soap holder. This can detract from the overall appearance of the bathroom and may indicate the presence of mold or mildew.
Grout Deterioration: If the soap holder is integrated into the tile surround, the surrounding grout lines can deteriorate over time. This can compromise the bond between the holder and the wall, leading to loosening and potential water damage behind the tiles.
Repairing a Loose or Detached Soap Holder
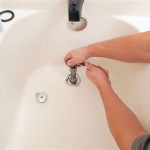
A loose or detached soap holder necessitates immediate attention to prevent further damage and potential accidents. The repair process typically involves the following steps:
Preparation: Gather the necessary tools and materials. These may include a putty knife or scraper, a cleaning solution (e.g., diluted vinegar or bleach), a stiff-bristled brush, sandpaper (optional), construction adhesive (e.g., epoxy or silicone-based adhesive specifically designed for wet environments), and masking tape.
Removal of Old Adhesive and Grout: Carefully remove any remaining old adhesive or grout from the back of the soap holder and the wall surface. A putty knife or scraper can be used to gently pry away loose material. Exercise caution to avoid damaging the soap holder or the surrounding tiles. For stubborn residue, a plastic razor blade can be a safer alternative to a metal scraper.
Cleaning the Surfaces: Thoroughly clean both the back of the soap holder and the wall surface with a cleaning solution to remove any dirt, grease, or soap scum. This will ensure proper adhesion of the new adhesive. A stiff-bristled brush can be helpful for scrubbing away residue. Rinse the surfaces with clean water and allow them to dry completely.
Applying New Adhesive: Apply a generous bead of construction adhesive to the back of the soap holder, ensuring that it covers the entire surface that will be in contact with the wall. Follow the manufacturer's instructions regarding application and curing time. Some adhesives require a specific application technique, such as applying the adhesive in dots or spirals.
Reattaching the Soap Holder: Carefully position the soap holder against the wall, aligning it with its original location. Press firmly to ensure good contact between the soap holder and the wall surface. Use masking tape to secure the soap holder in place while the adhesive cures. The tape will prevent the holder from sliding or detaching during the curing process.
Curing and Finishing: Allow the adhesive to cure completely according to the manufacturer's instructions. This may take 24 to 48 hours. Once the adhesive is fully cured, remove the masking tape. If necessary, apply a bead of grout around the edges of the soap holder to seal the gap between the holder and the wall. Smooth the grout with a wet finger or grout float.
Repairing a Cracked or Broken Soap Holder
Repairing a cracked or broken soap holder requires a different approach, depending on the severity of the damage and the material of the holder. In some cases, replacement may be a more practical option. However, for minor cracks, the following steps can be attempted:
Assessment: Evaluate the extent of the damage. Minor hairline cracks can often be repaired with epoxy. Larger cracks or breaks may require more extensive repair or replacement.
Cleaning: Thoroughly clean the cracked or broken area with a cleaning solution to remove any dirt, grease, or soap scum. Allow the surface to dry completely.
Applying Epoxy: For minor cracks, apply a thin layer of epoxy adhesive specifically designed for the material of the soap holder (e.g., ceramic epoxy, plastic epoxy). Follow the manufacturer's instructions regarding mixing and application. Ensure that the epoxy fills the crack completely.
Clamping or Taping: If the crack is significant, clamp or tape the broken pieces together while the epoxy cures. This will ensure a strong bond. Use appropriate clamps or tape that will not damage the surface of the soap holder.
Sanding and Finishing: Once the epoxy is fully cured, sand the repaired area smooth with fine-grit sandpaper. This will remove any excess epoxy and create a seamless finish. If necessary, apply a sealant or paint to match the original color of the soap holder.
Replacement Considerations: If the soap holder is severely damaged or irreparable, replacement is the most viable option. When selecting a replacement, consider the material, size, and style to ensure a proper fit and aesthetic match. Ensure that the replacement soap holder is compatible with the existing mounting system.
Addressing Discoloration and Staining
Discoloration and staining can mar the appearance of a bathtub soap holder, but they can often be addressed with diligent cleaning and appropriate cleaning agents:
Initial Cleaning: Begin by cleaning the soap holder with a mild cleaning solution, such as dish soap and water. Use a soft cloth or sponge to scrub away any surface dirt and grime.
Vinegar Solution: For stubborn stains, try a solution of equal parts white vinegar and water. Vinegar is a natural disinfectant and can effectively remove soap scum and mineral deposits. Apply the solution to the stained area and let it sit for 15-20 minutes before scrubbing with a soft brush.
Baking Soda Paste: For particularly tough stains, create a paste of baking soda and water. Apply the paste to the stained area and let it sit for several hours or overnight. Then, scrub with a soft brush and rinse thoroughly with water.
Bleach Solution (Use with Caution): For persistent discoloration, a diluted bleach solution can be used. However, exercise extreme caution when using bleach, as it can damage certain materials and release harmful fumes. Always wear gloves and eye protection, and ensure proper ventilation. Dilute the bleach with water according to the manufacturer's instructions. Apply the solution to the stained area and let it sit for a few minutes before rinsing thoroughly with water. Avoid using bleach on porous materials, as it can be absorbed and cause further damage.
Professional Cleaning Products: Several commercial cleaning products are specifically designed for removing soap scum and hard water stains. Follow the manufacturer's instructions carefully when using these products.
Prevention: The best way to prevent discoloration and staining is to regularly clean the soap holder with a mild cleaning solution. Dry the soap holder after each use to prevent the buildup of moisture and soap residue.
Preventative Maintenance for Longevity
Proactive preventative maintenance is critical for prolonging the life of a bathtub soap holder and avoiding costly repairs in the future. Incorporating the following practices into a regular bathroom cleaning routine can significantly reduce the likelihood of problems:
Regular Cleaning: Clean the soap holder at least once a week with a mild cleaning solution to remove soap scum, mineral deposits, and other debris. This will prevent the buildup of stubborn stains and maintain the aesthetic appearance of the holder.
Proper Ventilation: Ensure adequate ventilation in the bathroom to reduce moisture levels. Use the exhaust fan during and after showers or baths to remove excess humidity. High humidity can promote mold and mildew growth, which can damage the soap holder and surrounding areas.
Avoid Harsh Chemicals: Avoid using harsh chemicals or abrasive cleaners on the soap holder, as they can damage the surface and cause discoloration or etching. Stick to mild cleaning solutions and soft cloths or sponges.
Inspect Regularly: Periodically inspect the soap holder for any signs of loosening, cracking, or grout deterioration. Address any minor issues promptly to prevent them from escalating into more significant problems.
Re-grout as Needed: If the soap holder is integrated into the tile surround, re-grout the surrounding grout lines as needed to maintain a watertight seal. This will prevent water from seeping behind the tiles and causing damage.
Avoid Overloading: Avoid overloading the soap holder with excessive weight, as this can put stress on the mounting hardware and adhesive. Use a separate shelf or caddy to store larger items.
By adhering to these preventative maintenance practices, the lifespan of the bathtub soap holder can be significantly extended, minimizing the need for frequent repairs and replacements.

How To Replace A Broken Tile Soap Dish In Shower

Shower Soap Dish Clean Break Can I Repair How

Replacing Ceramic Soap Dish Harder Than You Think The Spokesman Review

Removing Broken Ceramic Wall Mount Soap Dishes Tile Advice Forums John Bridge

Installing Shower Caddies Or Soap Holders Into Tile Fix It Friend Handyman Services In Downtown Toronto

How To Remove And Install Soap Dish Holder Tile

Removing Broken Ceramic Wall Mount Soap Dishes Tile Advice Forums John Bridge

How To Repair Ceramic Dish Soap In Showe Bunnings Work Community

Gorilla Glue Quick Fix Tub Soap Dish

How To Hide Soap Dish Hometalk
Related Posts