Essential Aspects of Installing Bathtub Faucet Stem
Installing a bathtub faucet stem can be a straightforward task if you have the right tools and know the proper steps. Here's a comprehensive guide to help you through the process:
Tools Required: Before you start, gather the necessary tools: adjustable wrench, pliers, flathead screwdriver, Allen wrench (if required), and a new faucet stem.
Step 1: Turn Off the Water Supply: Begin by shutting off the water supply to the bathtub. Locate the shut-off valves underneath the sink or behind the bathtub and turn them clockwise.
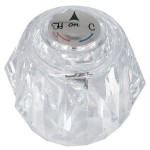
Step 2: Remove the Handle: Most faucet stems are hidden behind the handle. Use an Allen wrench or a flathead screwdriver to remove the handle's set screw. Pull the handle straight towards you to detach it.
Step 3: Unscrew the Bonnet Nut: Once the handle is removed, you'll see a large nut called the bonnet nut. Use an adjustable wrench to carefully unscrew it counterclockwise. Do not overtighten.
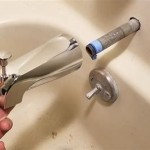
Step 4: Remove the Stem: Behind the bonnet nut is the faucet stem. Use a pair of pliers to grasp the stem and gently pull it straight out. If the stem is stuck, gently twist it back and forth while pulling.
Step 5: Inspect the Stem and Seat: Carefully inspect the removed stem for any damage or wear. The seat, where the stem fits into, should also be clean and free of debris. If necessary, clean the seat using a cloth or a small brush.
Step 6: Install the New Stem: Insert the new stem into the seat and align it properly. Gently tap the stem into place using pliers or a small hammer.
Step 7: Replace the Bonnet Nut: Thread the bonnet nut back onto the stem and hand-tighten it. Use an adjustable wrench to further tighten it, but avoid excessive force.
Step 8: Replace the Handle: Reattach the handle to the stem and secure it using the set screw. Tighten the screw using an Allen wrench or a flathead screwdriver.
Step 9: Turn On the Water Supply: Slowly turn on the shut-off valves to restore the water supply. Check for leaks around the faucet stem and handle. If there are any leaks, adjust the bonnet nut accordingly.
Tips:
- Use the correct size wrench to avoid damaging the faucet.
- Apply a small amount of plumber's grease to the stem threads for a smoother installation.
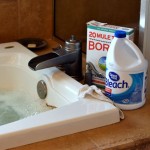
- If the faucet still leaks after replacing the stem, the washer or O-ring may need to be replaced as well.
- If you encounter any difficulties, do not hesitate to consult a qualified plumber.

How To Fix A Leaking Bathtub Faucet Diy Family Handyman

How To Fix A Leaking Bathtub Faucet Diy Family Handyman

How To Replace A Shower Valve 12 Steps With Pictures Wikihow

How To Remove Bathtub Faucet Stems Quick And Easy

Installing A Tub Faucet Fine Homebuilding

How To Fix A Leaking Bathtub Faucet Diy Family Handyman

Learn How To Remove And Install Various Tub Spouts

How To Replace Bathtub Faucet Stem Home For Relax

Learn How To Remove And Install Various Tub Spouts

How To Repair A Shower Valve Stem Ask This Old House