How to Fix a Lift and Turn Bathtub Stopper
The lift and turn bathtub stopper is a common mechanism used to control water drainage in bathtubs. Its relatively simple design makes it a popular choice, but like all mechanical devices, it is prone to occasional malfunctions. Understanding the components of the lift and turn stopper and recognizing common problems can facilitate effective troubleshooting and repair. This article provides a comprehensive guide to diagnosing and resolving issues with lift and turn bathtub stoppers.
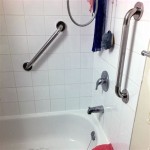
The lift and turn stopper operates on a basic principle: a stopper connected to a vertical rod is raised or lowered to open or close the drain. A knob located on top of the rod allows the user to rotate the stopper, typically engaging a mechanism that either lifts the stopper, allowing water to drain, or lowers it to create a seal. The simplicity of this design contributes to its widespread use, but also dictates the types of problems typically encountered.
Identifying Common Lift and Turn Stopper Issues
Several issues commonly plague lift and turn bathtub stoppers. Identifying the specific problem is the first crucial step in performing an effective repair. These issues often manifest in predictable ways:
Slow or No Drainage: This is perhaps the most common complaint. Slow drainage suggests a partial blockage, while a complete absence of drainage indicates a more significant obstruction.
Stopper Not Sealing Properly: When the stopper fails to create a watertight seal, water slowly drains from the tub even when the stopper is in the closed position. This can be caused by a number of factors, including debris lodged between the stopper and the drain, a worn stopper, or misaligned components.
Difficulty Lifting or Turning the Stopper: Resistance when attempting to lift or turn the stopper can indicate corrosion, mineral buildup, or a mechanical obstruction within the stopper assembly.
Stopper Coming Completely Out: In some cases, the stopper may detach entirely from the lift rod, rendering it useless. This typically occurs due to a loose or broken connection between the stopper and the rod.
Accurately diagnosing the issue will streamline the repair process. Careful observation of the stopper's behavior and examination of its components are essential.
Tools and Materials Required for Repair
Before beginning any repair work, gathering the necessary tools and materials is paramount. Having the right equipment on hand will ensure a smoother and more efficient process. The following is a list of standard tools and materials that may be required:
Screwdriver Set: Both flathead and Phillips head screwdrivers are essential for disassembling and reassembling the stopper mechanism.
Pliers (Needle-nose and Regular): Pliers are useful for gripping and manipulating small parts, particularly during disassembly and reassembly.
Adjustable Wrench: An adjustable wrench may be needed to loosen or tighten fittings on the drain assembly.
Plumber's Putty: This material is used to create a watertight seal between certain components, such as the drain flange and the bathtub.
White Vinegar or Commercial Drain Cleaner: These solutions can be used to dissolve mineral buildup and clear minor blockages.
Old Toothbrush or Scrub Brush: A brush is helpful for cleaning debris and buildup from the stopper and drain.
Clean Rags or Towels: Rags are essential for cleaning up spills and wiping away debris.
Replacement Stopper (Optional): If the stopper is damaged beyond repair, a replacement will be required.
Flashlight: A flashlight can be useful for inspecting the drain assembly and identifying obstructions.
The specific tools and materials needed will depend on the nature of the problem and the type of repair being performed. It is advisable to gather a comprehensive set of tools to be prepared for a variety of situations.
Step-by-Step Repair Guide
Addressing a malfunctioning lift and turn stopper requires a systematic approach. The following steps provide a detailed guide to diagnosing and repairing common issues:
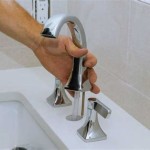
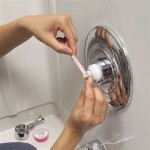
Step 1: Removing the Stopper: Most lift and turn stoppers can be removed by simply lifting them to the open position and then unscrewing the knob on top. In some cases, a small set screw may be located on the side of the knob. This set screw should be loosened with a small screwdriver before attempting to unscrew the knob. Once the knob is removed, the stopper and lift rod can be lifted out of the drain.
Step 2: Inspecting the Stopper and Drain: Once the stopper is removed, thoroughly inspect it for signs of damage, wear, or buildup. Check the rubber or plastic seal on the bottom of the stopper for cracks, tears, or deformation. Examine the lift rod for corrosion or bending. Use a flashlight to inspect the drain opening for obstructions, such as hair, soap scum, or other debris.
Step 3: Cleaning the Stopper and Drain: Use an old toothbrush or scrub brush to remove any buildup from the stopper and drain. White vinegar or a commercial drain cleaner can be used to dissolve mineral deposits and soap scum. For stubborn blockages in the drain, needle-nose pliers can be used to carefully extract debris. Be cautious not to damage the drainpipe or any of its components during this process.
Step 4: Adjusting the Stopper Height: If the stopper is not sealing properly, it may be necessary to adjust its height. Many lift and turn stoppers have an adjustable mechanism that allows the user to fine-tune the stopper's position. This mechanism is typically located on the lift rod, near the point where it connects to the stopper. Refer to the manufacturer's instructions for specific details on how to adjust the stopper height. In general, the stopper should be adjusted so that it sits snugly against the drain opening when in the closed position, but not so tightly that it is difficult to lift.
Step 5: Reassembling the Stopper: Once the stopper has been cleaned and adjusted, it can be reassembled. Insert the lift rod back into the drain and screw the knob back onto the top of the rod. If a set screw was removed, be sure to tighten it to secure the knob. Test the stopper to ensure that it lifts and turns smoothly and that it creates a watertight seal when in the closed position.
Step 6: Addressing Persistent Problems: If the stopper continues to malfunction after cleaning and adjustment, further investigation may be necessary. In some cases, the problem may lie deeper within the drainpipe. Removing the drain flange (the metal ring that surrounds the drain opening) may be required to access and clear any blockages further down the pipe. This process may involve disconnecting the drainpipe from the overflow tube. If unfamiliar with plumbing procedures, it is advisable to consult a qualified plumber to avoid causing damage to the plumbing system.
Step 7: Replacing Damaged Components: If the stopper or any of its components are damaged beyond repair, replacement is necessary. Replacement stoppers can be purchased at most hardware stores and home improvement centers. Ensure that the replacement stopper is compatible with the existing drain assembly before purchasing it. When replacing the stopper, follow the manufacturer's instructions for installation.
By following these steps, many common lift and turn stopper problems can be resolved effectively. However, it is important to exercise caution and to consult a qualified plumber if the problem is beyond the scope of one's expertise.
Preventative Maintenance for Lift and Turn Stoppers
Regular preventative maintenance can significantly extend the lifespan of a lift and turn bathtub stopper and minimize the likelihood of malfunctions. Implementing a few simple practices can help keep the stopper functioning smoothly and efficiently:
Regular Cleaning: Periodically remove the stopper and clean it to prevent the accumulation of hair, soap scum, and other debris. A monthly cleaning routine is generally sufficient to prevent significant buildup.
Flushing the Drain: Occasionally flush the drain with hot water to help dissolve soap scum and prevent blockages. A mixture of baking soda and vinegar can also be used to clear minor blockages.
Avoiding Harsh Chemicals: Avoid using harsh chemical drain cleaners, as these can damage the stopper and drainpipe. These chemicals can corrode metal components and degrade rubber or plastic seals.
Promptly Addressing Leaks: If water is leaking around the stopper, address the problem promptly. A leaking stopper can waste water and potentially cause damage to the bathtub surround.
By incorporating these preventative maintenance practices, the likelihood of encountering problems with a lift and turn bathtub stopper can be greatly reduced, saving time and money on repairs in the long run. Regular cleaning and careful usage will ensure long-lasting performance.

Cannot Un The Knob From Lift And Turn Bathtub Stopper R Fixit

How To Properly Remove A Lift And Turn Bathtub Stopper

Removing A Lift Turn Stopper 1 Step

Pull And Turn Style Tub Drain Not Working Solved A Big Manufacturing Flaw

How To Replace Bathtub Drain Stopper With A Lift And Turn Diy

How To Remove A Bathtub Drain Stopper Mr Rooter

Watco Lift And Turn Replacement Bath Tub Stopper Installation

How To Remove A Bathtub Drain The Home Depot

How To Remove A Bathtub Drain Stopper

How To Replace A Bathtub Drain Stopper With Lift And Turn Repair
Related Posts