How to Paint Bathtub Faucet
Rejuvenating an aged or discolored bathtub faucet with a fresh coat of paint is a budget-friendly yet effective way to enhance the aesthetics of your bathroom. The process is relatively straightforward and can be completed within a few hours, giving your bathroom a renewed look without breaking the bank.
Before embarking on this DIY project, it is crucial to gather the necessary materials. These include:
- Fine-grit sandpaper or sanding sponge
- Rubbing alcohol or acetone
- Painter's tape (optional)
- Primer specifically designed for metal surfaces
- High-quality spray paint in your desired color
- Clear sealant (optional)
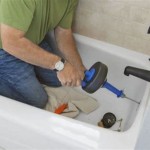
To ensure a smooth and long-lasting finish, preparation is key. Start by thoroughly cleaning the faucet with rubbing alcohol or acetone to remove any dirt, grime, or oils. If there are any stubborn mineral deposits, consider using a commercial cleaner specifically designed for bathroom fixtures. Once the faucet is clean, gently sand it with fine-grit sandpaper or a sanding sponge to create a smooth surface for the paint to adhere to.
To protect surrounding surfaces from paint overspray, apply painter's tape around the base of the faucet and any other areas you wish to keep paint-free. Ensure the tape is securely attached to prevent paint from seeping underneath.
Before applying paint, apply a thin and even coat of primer specifically designed for metal surfaces. This step helps promote adhesion and provides a smooth base for the topcoat. Allow the primer to dry completely according to the manufacturer's instructions.
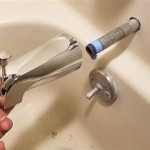
With the primer dry, it's time to apply the paint. Choose a high-quality spray paint designed for metal surfaces and bathrooms. Apply thin, even coats, holding the can approximately 6-8 inches away from the faucet. Allow each coat to dry partially before applying the next to prevent runs or drips.
For a more durable finish, apply several light coats of paint, allowing each to dry thoroughly. Once the final coat is dry, you can remove the painter's tape and admire your newly painted faucet.
To further enhance the longevity of your paint job, consider applying a clear sealant specifically designed for metal surfaces. This additional step helps protect the finish from water, wear, and tear.
With proper preparation and execution, painting your bathtub faucet can be a rewarding DIY project that will revitalize your bathroom's aesthetics. By following these steps and using the right materials, you can achieve a professional-looking finish that will last for years to come.

The Best Way To Spray Paint A Faucet Average But Inspired

The Best Way To Spray Paint A Faucet Average But Inspired

The Best Way To Spray Paint A Faucet Average But Inspired

Refinshing A Faucet With Spray Paint

The Best Way To Spray Paint A Faucet Average But Inspired

How To Spray Paint Shower Fixtures Easy Diy Method Bless Er House

How To Spray Paint Shower Fixtures Easy Diy Method Bless Er House

The Best Way To Spray Paint A Faucet Average But Inspired

How To Spray Paint Shower Fixtures Easy Diy Method Bless Er House

How To Spray Paint Bathroom Fixtures Faucet Makeover On A Budget Ep 2