How to Remove Old Bathtub Drain Cover
Replacing an old bathtub drain cover is a common DIY project that can refresh the look of your bathroom and address any leaks or functionality issues. While the process may seem intimidating, it is relatively simple with the right tools and knowledge. This article will guide you through the steps of removing an old bathtub drain cover, ensuring a successful and hassle-free experience.
Step 1: Gather Necessary Tools
Before embarking on the removal process, ensure you have the following tools readily available:
- Adjustable wrench
- Channel-lock pliers
- Screwdriver (Phillips head)
- Flathead screwdriver
- Bucket
- Gloves
- Towels
Step 2: Prepare the Area
To ensure a safe and efficient process, prepare the area around the bathtub drain by:
- Clearing the surrounding space to avoid obstructions.
- Placing a towel or absorbent material under the drain to catch any water that may spill.
- Wearing gloves to protect your hands from potential debris or moisture.
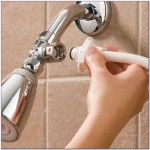
Step 3: Locate and Remove Overflow Plate (If Present)
Many bathtub drains feature an overflow plate located near the top of the drain opening. This plate prevents water from overflowing the tub if the main drain becomes blocked. To remove the overflow plate, follow these steps:
- Locate the overflow plate, which typically has a small hole or slot in the center.
- Use a flathead screwdriver to pry open the overflow plate, gently lifting it out of the drain.
- If the plate is secured with screws, use a Phillips head screwdriver to remove them.
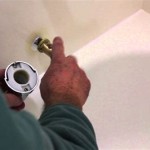
Step 4: Remove the Drain Cover
The drain cover is typically secured to the drain body with a threaded nut or a set of screws. To remove the cover, follow these steps:
- Locate the threaded nut or screws holding the drain cover in place.
- If the drain cover is secured with a threaded nut, use an adjustable wrench to loosen and remove it. Rotate the wrench counterclockwise to loosen the nut.
- If the drain cover is held in place by screws, use a Phillips head screwdriver to remove them.
- Once the nut or the screws are removed, gently lift the drain cover off the tub.
Step 5: Remove the Drain Assembly (If Necessary)
In some cases, the drain cover may be integrated with the drain assembly. If you need to replace or clean the drain assembly, you will need to remove it after removing the drain cover. To do this, follow these steps:
- Locate the threaded nut that secures the drain assembly to the tub. It is usually located under the drain cover.
- Use an adjustable wrench to loosen and remove the threaded nut. Rotate the wrench counterclockwise to loosen the nut.
- Once the nut is removed, gently lift the drain assembly out of the tub.
Step 6: Clean the Drain
Before installing a new drain cover, it is essential to clean the drain thoroughly. This will ensure a smooth and efficient water flow and prevent any blockages. To clean the drain, follow these steps:
- Use a small brush or a cleaning tool designed for drain cleaning to reach into the drain and remove any debris.
- Pour a drain cleaner solution into the drain and allow it to sit for the recommended time.
- Flush the drain thoroughly with water to remove the cleaning solution and any remaining debris.
Step 7: Install the New Drain Cover
Once the drain is cleaned, you can install the new drain cover. To install a new drain cover, follow these steps:
- Align the new drain cover with the drain opening.
- If the drain cover is secured with a threaded nut, screw it onto the drain assembly, ensuring the nut is tightened securely.
- If the drain cover is held in place by screws, insert the screws through the holes in the drain cover and into the drain assembly.
- Tighten the screws securely to ensure the drain cover is firmly in place.
Step 8: Install the Overflow Plate (If Present)
If you removed an overflow plate, install it back in place after the new drain cover is installed. To install the overflow plate, follow these steps:
- Align the overflow plate with the opening in the drain body.
- Gently press the overflow plate into place. If it has screws, use a Phillips head screwdriver to secure them.
By following these steps, you can successfully remove an old bathtub drain cover and install a new one. Remember to clean the drain thoroughly before installing a new cover to ensure a smooth and efficient water flow. This guide provides a comprehensive overview of the process, but it is always best to consult with a qualified plumber for any major plumbing issues or concerns.

How To Remove A Bathtub Drain The Home Depot

How To Remove A Bathtub Drain Stopper

How To Remove Bathtub Drain Stopper

How To Remove A Bathtub Drain Forbes Home

4 Easy Ways To Remove A Tub Drain Stopper Wikihow

How To Remove A Drain From Tub 13 Steps With Pictures

How To Remove A Bathtub Drain Stopper Mr Rooter

How To Remove Bathtub Drain Stopper That Spins Freely

The Easiest Way To Remove An Old Bathtub Drain

How To Remove A Bathtub Drain The Home Depot