How to Replace a Bathtub in a Mobile Home
Replacing a bathtub in a mobile home can be a challenging but rewarding project. Mobile homes often have unique construction and limited space, requiring specific considerations for a successful renovation. This guide will outline the essential steps to replace a bathtub in a mobile home, ensuring a smooth and efficient process.
1. Planning and Preparation
Before diving into the replacement process, meticulous planning and preparation are paramount. This phase involves understanding your mobile home's structure, assessing the current bathtub's condition, and gathering necessary materials and tools.
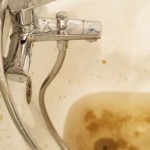
Assess the Existing Bathtub: Begin by inspecting the condition of your current bathtub. Determine if it's simply outdated or has structural damage requiring a complete replacement. This evaluation helps guide your material selection and the scope of the project.
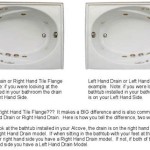
Measure the Space: Carefully measure the existing bathtub's dimensions and ensure it aligns with the available space in the bathroom. Consider the width, length, and depth, and remember to account for any surrounding fixtures or walls.
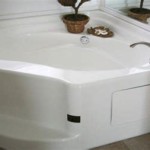
Choose the Right Bathtub: Select a new bathtub that complements your bathroom's style and meets your needs. Consider materials like acrylic, fiberglass, or cast iron based on durability, aesthetics, and budget. Consult with a professional plumber to ensure the bathtub you choose is compatible with your existing plumbing system.
Gather Necessary Materials and Tools: Create a comprehensive list of materials and tools. These may include:
- New bathtub and surround
- Plumbing fixtures (faucet, drain, overflow)
- Tub sealant and caulk
- Screws and fasteners
- Safety goggles and gloves
- Level and measuring tape
- Saw and drill
- Wrench and pliers
- Utility knife and putty knife
- Screwdriver and hammer
Obtain Permits: Check local building codes and regulations to see if permits are required for bathtub replacement. Contact your local building department for guidance.
2. Removal and Demolition
Once you've gathered your materials and prepared the work area, the next step involves removing the existing bathtub and any associated fixtures. This process requires careful planning and execution to avoid damage to the surrounding structure.
Disconnect Plumbing: Turn off the water supply to the bathtub. Use wrenches to detach the water lines and drainpipe from the bathtub. Be sure to place a bucket beneath the drain to catch any remaining water.
Remove the Bathtub Surround: Carefully remove the existing bathtub surround using a pry bar or utility knife. Be cautious not to damage the surrounding walls or flooring. If the surround is attached with screws, remove them using a screwdriver.
Remove the Bathtub: This step may require assistance. Use a crowbar or other lifting tools to carefully pry the old tub out of the bathroom. Be mindful of the weight and avoid damaging the flooring or surrounding structure. If the bathtub is particularly heavy, consider using a jack to lift it from the floor.
Dispose of Debris: Dispose of the old bathtub and surround properly according to local waste management guidelines. You may need to cut the bathtub into smaller pieces for easier disposal.
3. Installation and Plumbing
After removing the old bathtub, prepare the area for the new installation. This involves creating a level and stable base for the new tub, ensuring proper plumbing connections, and attaching the new surround.
Prepare the Base: Ensure the bathroom floor is level and free of debris. If necessary, use leveling compound or shims to adjust the floor and create a stable base for the new bathtub.
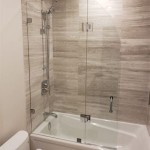
Install the New Bathtub: Carefully lower the new bathtub into place. Ensure that it sits level and is properly aligned with the surrounding walls and fixtures. Secure it to the floor using screws or clamps.
Connect Plumbing: Connect the new plumbing fixtures to the bathtub, including the faucet, drain, and overflow. Securely attach the drainpipe to the bathtub's drain. This process requires careful attention to ensure that all connections are tight and leak-free.
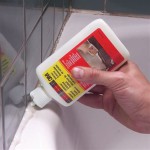
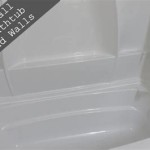
Install the Bathtub Surround: Attach the new bathtub surround to the walls, ensuring a secure and watertight seal. Use silicone caulk or sealant around the edges of the surround to prevent water damage.
4. Testing and Refinishing
Once the bathtub is installed, thoroughly test all plumbing connections and ensure there are no leaks. If necessary, tighten connections or apply additional sealant for a watertight seal.
Test Plumbing Connections: Turn on the water supply and check for any leaks. If any leaks are present, re-tighten the connections or apply additional sealant. Allow the bathtub to fill with water and drain to test the drain and overflow functions.
Clean and Finish: After testing the plumbing, clean the bathtub thoroughly to remove any debris or dust. Apply sealant or caulk around the edges of the bathtub and surround for a durable and watertight finish.
Enjoy Your New Bathtub: Once the installation is complete, you can enjoy your brand-new bathtub.

Replace Or Repair A Mobile Home Bathtub

Mobile Home Tub Replacement What You Need To Know Before Order

How To Install A Bathtub Faucet In Mobile Home

Complete Mobile Home Bathroom Remodel Cast Iron Tub Pt 3

Replace Or Repair A Mobile Home Bathtub Page 2 Of

Tips For Replacing A Bathtub In Modular Home

How To Replace A Mobile Home Bathtub Faucet

Replace Or Repair A Mobile Home Bathtub Page 2 Of

How To Install A Bathtub Faucet In Mobile Home

Mobile Home Bath Tub Shower Installation Bathroom Remodeling Bathrooms Manufactured Remodel
Related Posts