Understanding Moen Bathtub Faucet Parts
A Moen bathtub faucet, like any other plumbing fixture, consists of various parts that work together to provide you with a smooth, efficient, and reliable water flow. Understanding these parts is crucial for troubleshooting issues, conducting repairs, or even upgrading your faucet. This article dives into the anatomy of a Moen bathtub faucet, exploring its key components and their functions.
1. The Spout
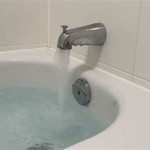
The spout is the most noticeable part of the bathtub faucet. It's responsible for delivering water directly into the tub. Most Moen spouts are made from metal, often chrome or nickel, and are designed to withstand the rigors of daily use. Depending on the faucet model, the spout might be fixed or swivel, offering flexibility in directing the water flow.
2. The Handle(s)
The handle(s) are the control mechanism for the faucet. They allow you to regulate the flow of water and adjust its temperature. Moen bathtub faucets typically come with one or two handles. Single-handle faucets use a cartridge to regulate both flow and temperature, while two-handle faucets employ separate valves for hot and cold water.
The handle mechanism itself can vary. Some faucets have a lever handle, while others use a knob. Lever handles provide a more intuitive way to adjust water flow and temperature, while knobs require a bit more effort. Moen lever handles are often equipped with a smooth, ergonomic design for easy operation.
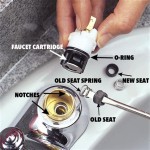
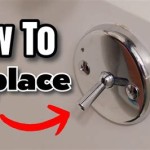
3. The Cartridge or Valves
The cartridge or valves sit inside the faucet body, controlling the flow of water. Cartridges are typically found in single-handle faucets, and they contain a series of seals and springs that regulate both water flow and temperature. When the handle is turned, it moves a ceramic disc within the cartridge, opening or closing the water passageways.
Two-handle faucets, on the other hand, utilize separate valves for hot and cold water. These valves typically consist of a stem, a seat, and a washer. When the handle is turned, it moves the stem up or down, compressing the washer against the seat to control the water flow.
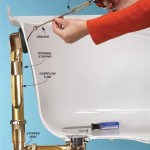
4. The Faucet Body
The faucet body is the main structure that holds all the other components together. It's typically made from metal or plastic and features connections for the supply lines, spout, and handle(s). The faucet body also contains internal passages and chambers through which water flows. Moen faucet bodies are designed to provide durability and resistance to corrosion.
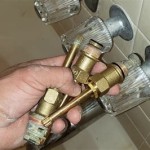
5. The Supply Lines
The supply lines connect the faucet body to the hot and cold water pipes in your home. They are typically made from braided stainless steel, flexible copper, or PEX tubing. The supply lines bring water to the faucet and allow you to direct it to the tub.
6. The Diverter
Some Moen bathtub faucets feature a diverter, which allows you to switch the water flow between the spout and a handheld showerhead. The diverter mechanism is typically located on the faucet body or the spout itself and is operated by a lever or button. It directs the water flow through different internal passages, enabling you to choose between a tub fill or a shower experience.
7. The Aerator
The aerator is a small component located at the end of the spout. It mixes air with the water stream, creating a smooth and consistent flow. By injecting air, the aerator reduces splashing and improves water efficiency. Aerators can be easily removed for cleaning or replacement.
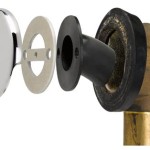
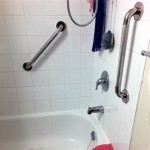
8. The Escutcheon
The escutcheon is a decorative plate that covers the hole in the tub deck where the faucet is mounted. It gives the faucet a finished look and helps to hide the plumbing connections behind it. Escutcheons can be made from various materials, such as metal, plastic, or ceramic, and they come in different styles and finishes to complement your bathroom decor.
Understanding the various components that make up a Moen bathtub faucet can significantly benefit you in several ways. By knowing the functions and workings of these parts, you can:
- Diagnose problems easily and efficiently
- Replace worn-out or damaged parts with ease
- Choose the right spare parts for your specific faucet model
- Make informed decisions when upgrading your faucet
Moen is a renowned brand known for its quality and reliability. Their bathtub faucets are designed to provide years of trouble-free performance. By understanding the parts that make up these faucets, you can ensure their continued smooth operation and enjoy the benefits of a well-functioning bathroom.

Exploded Parts Moen

Moen L3175 Tub And Shower Faucet Ereplacementparts Com

Moen 82495brb Tub And Shower Faucet Ereplacementparts Com

Moen 82006cbn Tub And Shower Faucet Ereplacementparts Com

Moen T3124cp Tub And Shower Faucet Ereplacementparts Com

Moen T170 Legend Tub And Shower Single Knob Handle Acrylic Trim Kit In Polished Chrome

Valley Back To Tub Shower Replacement Parts

Handle 99103382 Best Plumbing Specialties

Moen 7700 Parts List And Diagram Ereplacementparts Com Kitchen Faucet Repair

Moen L2363 Tub And Shower Faucet Ereplacementparts Com
Related Posts