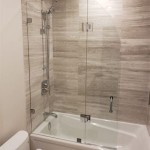
How To Tile A Bathtub Shower Wall
Tiling a bathtub shower wall is a rewarding home improvement project that can significantly enhance the aesthetic and value of a bathroom. While it requires patience and attention to detail, a well-executed tiling job can transform an ordinary shower into a luxurious spa-like retreat. This guide will provide a comprehensive step-by-step process for successfully tiling a bathtub shower wall.
Preparation is Key
Before beginning any tiling project, adequate preparation is crucial for ensuring a smooth and successful outcome. Rushing through the preparation phase can lead to complications later on, so take the time to do it right.
- Gather necessary tools and materials. This includes tiles, tile adhesive (thin-set mortar), grout, spacers, a notched trowel, a wet saw or tile cutter, a level, a rubber grout float, sponges, buckets, safety glasses, and gloves.
- Inspect the existing wall surface. Ensure the wall is clean, dry, and free of any loose debris, mildew, or soap scum. Repair any cracks or damage to the wall before proceeding. Any existing tile should be removed, and the wall should be thoroughly cleaned.
- Install a waterproof backer board. Cement board is a popular choice and provides a stable and water-resistant surface for tile adhesion. Secure the backer board to the wall studs using appropriate screws, leaving a small gap between the bathtub and the bottom edge of the backer board.
- Apply a waterproof membrane. This is essential for preventing water damage behind the tiles. Carefully apply the membrane over the backer board, ensuring all seams are sealed properly.
Planning the Tile Layout
Careful planning of the tile layout prevents uneven cuts and ensures a professional-looking finished product. A well-planned layout can also minimize tile waste.
- Dry-fit the tiles. Start by placing tiles along the bottom edge of the shower wall, using spacers to maintain consistent gaps. Dry-fitting allows for visualizing the final layout and making necessary adjustments before applying adhesive.
- Consider the focal point. If incorporating decorative tiles or a border, plan their placement carefully to create a visually appealing design. Consider the placement of fixtures such as showerheads and faucets.
- Mark reference lines. Once the layout is finalized, use a level and a pencil to draw vertical and horizontal reference lines on the backer board. These lines will serve as guides during the tile installation process.
Setting the Tile
Applying the tiles correctly is critical for their long-term adhesion and the overall durability of the shower wall.
- Mix the thin-set mortar. Follow the manufacturer’s instructions for proper mixing ratios. The consistency should be similar to peanut butter – thick enough to hold the tiles but not so thick that it's difficult to spread.
- Apply the thin-set. Using a notched trowel, apply a thin layer of thin-set to a small section of the backer board, working in manageable areas. Hold the trowel at a 45-degree angle to create ridges in the mortar.
- Place the tiles. Firmly press each tile into the thin-set, ensuring full contact with the adhesive. Twist slightly to ensure proper bonding. Use spacers between tiles to maintain even grout lines.
- Check for levelness. Regularly check the tiles for levelness using a level. Adjust as needed before the thin-set dries.
- Clean excess thin-set. Remove any excess thin-set from the tile surface and grout lines immediately using a damp sponge.
Grouting and Sealing
Grouting fills the spaces between the tiles, providing a waterproof seal and completing the finished look.
- Mix the grout. Follow the manufacturer's instructions for mixing the grout to the correct consistency.
- Apply the grout. Using a rubber grout float, apply the grout to the tile surface at a 45-degree angle, pressing it firmly into the grout lines.
- Remove excess grout. After the grout has begun to set, use a damp sponge to remove excess grout from the tile surface, being careful not to pull grout out of the lines.
- Allow the grout to cure. Follow the manufacturer's instructions for the recommended curing time before using the shower.
- Apply a sealant. After the grout has fully cured, apply a grout sealant to protect it from moisture and staining.
Finishing Touches
The final steps ensure a polished look and protect the longevity of the tile installation.
- Caulk the seams. Apply caulk along the seams where the tile meets the bathtub and any other fixtures to prevent water penetration.
- Clean the tiles. Once everything is dry, give the tiles a final cleaning to remove any remaining dust or debris.
By following these detailed instructions and paying attention to each step, a beautiful and long-lasting tiled shower wall can be achieved.

The Complete Guide To Installing Tile On Shower Or Bathtub Walls

How To Tile Shower Bathtub Walls The Ultimate Guide Handyman Startup

Part 1 How To Tile 60 Tub Surround Walls Preparation Where Start Tiling Layout

A Diyer S Guide To Waterproofing And Tiling Tub Surround Ugly Duckling House

How Long Does It Take To Tile A Shower When You Diy

Diy Tips For Tiling A Tub Surround Twofeetfirst

Diy Tile Tub Surround That Will Save You Money

9 Stylish Alternatives For Ceramic Tile Shower Walls Or Bases Innovate Building Solutions Blog Home Remodeling Design Ideas Advice

Diy Tips For Tiling A Tub Surround Twofeetfirst

Tile And Tub Bathtub Surround Bathroom Remodel Designs Shower Walls