Replacing a Bathtub Diverter Valve: A Comprehensive Guide
A malfunctioning bathtub diverter valve can disrupt your daily routine and cause frustration. Replacing it can seem daunting, but it's a relatively straightforward task with the right knowledge and tools. Here's a comprehensive guide to help you through the process:
Materials You'll Need:
- New bathtub diverter valve
- Adjustable wrench
- Screwdriver
- Plumber's tape
- Pipe cleaner
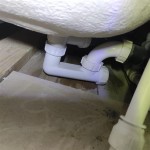
Step 1: Turn Off Water and Remove Handle
Turn off the hot and cold water supply valves beneath the sink. Then, use a screwdriver to remove the handle from the diverter valve. Pull the handle straight off and set it aside.
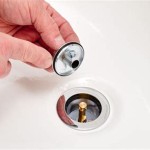
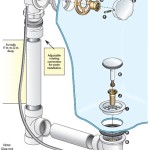
Step 2: Remove Escutcheon Plate
The escutcheon plate is the decorative cover around the valve. Use an adjustable wrench to loosen the locknut holding it in place. Remove the plate and any gaskets or washers behind it.
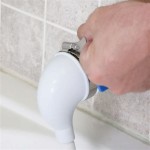
Step 3: Unscrew Old Valve
Use the adjustable wrench to turn the old valve counterclockwise and remove it from the wall. Be careful not to damage the threads on the pipe.
Step 4: Clean Valve Seat
Before installing the new valve, clean the valve seat on the wall. Use a pipe cleaner or toothbrush to remove any debris or mineral deposits. Apply a small amount of plumber's tape to the threads of the new valve.
Step 5: Install New Valve
Position the new valve over the valve seat and screw it in clockwise. Tighten it securely, but not too tightly. Avoid overtightening to prevent damage.
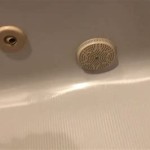
Step 6: Reattach Escutcheon Plate
Replace the escutcheon plate and insert any necessary gaskets or washers. Tighten the locknut snugly to hold the plate in place.
Step 7: Install Handle
Slide the handle back onto the diverter valve and tighten the screw to secure it. Turn on the water supply valves and check for leaks. Adjust the handle as needed to ensure proper water diversion.
Tips:
- If the valve seat is damaged, you may need to replace it.
- Use a flashlight to inspect the valve seat for any obstructions or damage.
- If the handle is loose after tightening, remove it and apply more plumber's tape to the valve stem.
- If you encounter any leaks, tighten the connections or replace the O-rings or gaskets.
Replacing a bathtub diverter valve is a manageable task that can be completed in under an hour. By following these instructions, you can restore your bathtub's functionality and enjoy a seamless bathing experience.

How To Replace A Shower Diverter Valve

Replacing A Shower Diverter Valve

How To Replace A Shower Diverter Valve

How To Fix A Shower Diverter Repair Or Replace

How To Replace A Shower Diverter Valve

How To Replace A Shower Diverter Valve

How To Replace A Shower Diverter Valve

Replace That Leaking Bathtub Shower Diverter For Good

How To Fix A Shower Diverter Repair Or Replace

Repair Leaking Tub Spout Diverter Pull In Shower Mode