How to Recaulk Bathtub Professionally
Maintaining a pristine bathroom involves addressing every detail, including the caulk around your bathtub. Caulking not only adds a finished touch but also seals gaps, preventing water damage and promoting hygiene. Whether you're a DIY enthusiast or a novice, recaulking your bathtub is a manageable task that can enhance the aesthetic appeal and functionality of your bathroom.
### Materials Required:- Caulk gun - Caulk - Caulk remover - Razor blade or utility knife - Damp cloth - Mineral spirits or rubbing alcohol (optional)
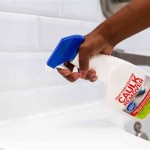
### Step 1: PreparationBegin by removing the old caulk. Use a caulk remover to soften the sealant and a razor blade or utility knife to gently scrape it away. Wipe down the surfaces around the bathtub to remove any remaining residue, ensuring a clean and dry surface for the new caulk.
### Step 2: Apply CaulkLoad the caulking gun with a tube of silicon-based caulk. Cut the tip of the tube at a 45-degree angle and insert the nozzle into the gap between the bathtub and wall or shower surround. Apply a bead of caulk evenly and smoothly, following the perimeter of the bathtub.
### Step 3: Smooth the CaulkImmediately after applying the caulk, use your finger or a damp cloth to smooth it out. This will create a tight seal and remove any excess caulk. Be sure to wipe off any residue that may have gotten on the bathtub or walls.
### Step 4: Clean UpAfter smoothing the caulk, remove any excess or residue with a damp cloth dipped in mineral spirits or rubbing alcohol. This will ensure a clean and professional-looking finish.
### Step 5: Allow to CureAllow the caulk to cure for the time specified on the product label. Typically, it takes around 24 hours for full curing to occur. Avoid using the bathtub during this period to prevent damaging the new caulk.
### Tips for Long-Lasting Caulk:- Use high-quality, silicon-based caulk specifically designed for bathrooms. - Ensure the surfaces around the bathtub are clean and dry before applying caulk. - Apply a consistent bead of caulk and smooth it out immediately. - Avoid overfilling gaps with caulk, as this can create a bulge that can become vulnerable to damage. - Clean up any excess caulk promptly to prevent staining or discoloration.
### Conclusion:Recaulking your bathtub is a practical and straightforward task that can improve the appearance and functionality of your bathroom. By following the steps outlined in this guide, you can achieve a professional-looking seal that will protect your bathroom from water damage and maintain its pristine condition for years to come.

How To Caulk A Bathtub On Sutton Place

How To Re Caulk A Bathtub

How To Re Caulk A Bathtub

How To Caulk A Bathtub 13 Steps With Pictures Wikihow
Recaulk A Tub In 5 Easy Steps Plus My Trick For Perfect Lines Living Rich On Less

How To Caulk A Bathtub 13 Steps With Pictures Wikihow

Caulking A Bathtub Simple Steps For Successful Seal

Reston Va Regrouting And Recaulking The Grout Medic Of Northern

How To Re Caulk A Bathtub

How To Caulk A Bathtub On Sutton Place
Related Posts