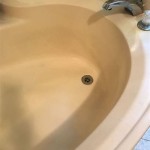
Paint Bathtub White: Transform Your Tub with Ease
Revitalizing your bathroom doesn't have to be a daunting task. With the right preparation and the perfect paint, you can give your old bathtub a fresh, white finish that will brighten up the space and enhance its overall appeal.
Painting a bathtub white requires careful consideration of the paint type, surface preparation, and application techniques. In this comprehensive guide, we'll provide you with all the essential knowledge and step-by-step instructions to ensure a flawless finish.
Choose the Right Paint
The key to a successful paint job is selecting the appropriate paint. For bathtubs, opt for an epoxy-based paint specifically designed for bathroom surfaces. These paints provide superior adhesion, durability, and resistance to moisture, ensuring a long-lasting finish.
Consider the sheen level of the paint. A satin or semi-gloss finish will offer a balance between easy cleaning and a subtle shine, while a high-gloss finish will create a more reflective surface.
Prepare the Surface
Thoroughly cleaning and preparing the bathtub surface is crucial for optimal paint adhesion. Start by removing all dirt and soap scum with a bathroom cleaner. Rinse the tub with clean water and allow it to dry completely.
Sand the bathtub surface lightly using a fine-grit sandpaper. This will create a slightly rough surface for the paint to adhere to. Wipe away any sanding dust with a clean cloth.
Apply Primer
Applying a primer before painting is highly recommended. Primer promotes paint adhesion and helps to prevent stains from bleeding through. Choose a primer specifically designed for bathroom surfaces and apply it evenly to the entire bathtub.
Allow the primer to dry according to the manufacturer's instructions.
Paint the Bathtub
Stir the epoxy paint thoroughly before applying it. Use a high-quality brush or roller designed for bathroom surfaces. Apply the paint in thin, even coats, allowing each layer to dry completely before applying the next.
For a smooth finish, apply several thin coats rather than one thick coat.
Allow to Cure
Once the bathtub is painted, allow it to cure properly according to the manufacturer's instructions. This curing process can take several days or even weeks, depending on the paint type and temperature.
During the curing period, do not use the bathtub or expose it to excessive moisture.
Enjoy Your Transformed Tub
With proper preparation and application, your bathtub will now boast a beautiful white finish that will enhance the look of your bathroom and provide years of satisfaction. Enjoy your newly refreshed bathing space!

Rust Oleum Specialty 1 Qt Satin White Tub And Tile Refinishing Kit Case Of 4 385279 The Home Depot

Rust Oleum Specialty 1 Qt Gloss White Tub And Tile Refinishing Kit 384165 The Home Depot

Diy Painted Bathtub Follow Up Your Questions Answered Addicted 2 Decorating

How To Paint Your Bathtub Yes Seriously Love Renovations

How To Paint Your Bathtub Yes Seriously Love Renovations

Yes You Can Paint Your Bathtub And Tile Here S How Toolbox Divas

My Painted Bathtub 5 Years Later An Honest Review Of Refinished Jacuzzi Tub

Rust Oleum Specialty 1 Qt Gloss White Tub And Tile Refinishing Kit 384165 The Home Depot

The Pros And Cons Of Refinishing A Bathtub Paint Denver

How To Paint A Tub With Rustoleum What Not Do
Related Posts


