Installing an Acrylic Bathtub: A Comprehensive Guide
Installing an acrylic bathtub is a great way to enhance your bathroom's style and functionality. Durable, easy to clean, and available in a wide range of colors and shapes, acrylic bathtubs provide a modern and elegant touch to any bathroom. Here's a comprehensive guide to walk you through the essential aspects of installing an acrylic bathtub.
Preparing the Bathtub Space
Before you begin installing the bathtub, ensure that the space is adequately prepared. Remove the old bathtub, plumbing fixtures, and any debris. Measure the space to determine the size of the bathtub you need and ensure there is enough room for plumbing connections.
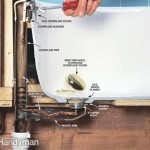
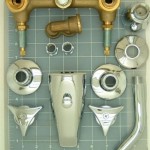
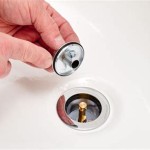
Installing the Drain and Overflow
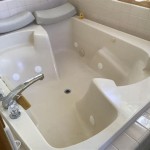
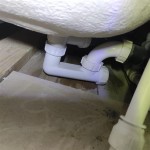
The first step in installing the acrylic bathtub is to install the drain and overflow. Apply a thin bead of plumber's putty around the drain hole and insert the drain assembly. Tighten the assembly securely, ensuring it is flush with the bathtub surface. Repeat the process for the overflow hole.
Leveling the Bathtub
Once the drain and overflow are installed, it's crucial to level the bathtub for proper water drainage and stability. Place the bathtub in position and adjust the leveling feet or shims underneath until it is perfectly level in all directions. Use a level to verify the accuracy.
Installing the Faucet
The next step is to install the faucet on the bathtub. Drill the necessary holes in the bathtub according to the faucet manufacturer's instructions. Apply a layer of plumber's putty around the faucet base and insert it into the hole. Tighten the faucet securely and connect the water supply lines.
Attaching the Bathtub to the Wall
Once the faucet is installed, attach the bathtub to the wall using screws or nails. Insert the screws or nails into the wall flanges provided on the bathtub and tighten them securely. This will prevent the bathtub from moving or wobbling.
Finishing Touches
The final step is to add finishing touches to the bathtub installation. Apply a bead of silicone caulk around the edges of the bathtub where it meets the wall, tiles, or other surfaces. Smooth out the caulk with a damp finger or caulk tool to create a watertight seal. Allow the caulk to dry completely before using the bathtub.
Conclusion
Installing an acrylic bathtub requires careful preparation, attention to detail, and a bit of do-it-yourself expertise. By following these steps and employing the necessary tools and materials, you can successfully install an acrylic bathtub that will provide you with years of enjoyment and relaxation.

An Overview Of Acrylic Tub Installation Extreme How To

How To Install A Bathtub Acrylic Kohler Archer Step By

How To Install A Bathtub An Acrylic Tub And Surround Diy

Quick And Easy Bathtub Installation

An Overview Of Acrylic Tub Installation Extreme How To

How You Can Install An Acrylic Bathtub Doityourself Com

An Overview Of Acrylic Tub Installation Extreme How To

Diy Bathroom Remodeling Part 1 Bathtub Installation

How To Install Acrylic Bathtub And Surround Walls Part 6

How To Install A Bathtub For Beginners Making Maanita
Related Posts