How to Replace Bathtub Fixtures
Replacing bathtub fixtures is a relatively easy DIY project that can be completed in a few hours. By following these steps, you can save yourself the cost of hiring a plumber.
Tools and Materials You'll Need
- Adjustable wrench
- Pliers
- Channel locks
- Putty knife
- Plumber's tape
- New bathtub fixtures
Step 1: Turn Off the Water Supply
The first step is to turn off the water supply to the bathtub. This is typically done by turning off the valves located under the sink.
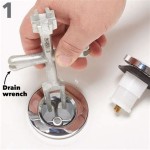
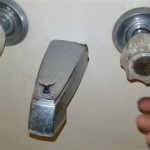
Step 2: Remove the Old Fixtures
Once the water supply is turned off, you can begin removing the old fixtures. Start by removing the faucet handles. This is typically done by unscrewing the screws that hold them in place.
Once the faucet handles are removed, you can remove the spout. This is typically done by unscrewing the nuts that hold it in place.
Finally, you can remove the showerhead. This is typically done by unscrewing the nut that holds it in place.
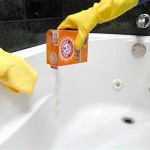
Step 3: Clean the Bathtub Surface
Once the old fixtures are removed, you should clean the bathtub surface. This will help to ensure that the new fixtures will adhere properly.
To clean the bathtub surface, use a putty knife to scrape away any old caulk or sealant. Then, use a damp cloth to wipe away any dirt or debris.
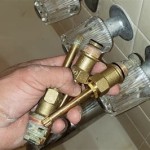
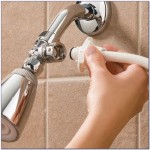
Step 4: Apply Plumber's Tape
Before installing the new fixtures, you should apply plumber's tape to the threads of the pipes. This will help to create a watertight seal.
To apply plumber's tape, simply wrap it around the threads of the pipe in a clockwise direction. Be sure to overlap the tape by at least one-half inch.
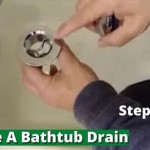
Step 5: Install the New Fixtures
Now you can begin installing the new fixtures. Start by installing the spout. This is typically done by screwing it onto the threads of the pipe.
Next, install the faucet handles. This is typically done by screwing them onto the stems of the faucet.
Finally, install the showerhead. This is typically done by screwing it onto the threads of the pipe.
Step 6: Turn On the Water Supply
Once the new fixtures are installed, you can turn on the water supply. Check for any leaks. If you find any leaks, tighten the nuts or bolts that hold the fixtures in place.
Step 7: Caulk Around the Fixtures
The final step is to caulk around the fixtures. This will help to prevent water from leaking behind the fixtures.
To caulk around the fixtures, use a caulk gun to apply a bead of caulk around the base of each fixture. Then, use your finger to smooth out the caulk.

How To Replace A Mobile Home Bathtub Faucet Parts Latest News

How To Install A Tub Spout The Home Depot With Thisoldhouse

How To Replace A Bathtub Spout Diy Family Handyman

Replacing Shower Tub Faucet How To Install A New

How To Fix A Leaking Bathtub Faucet The Home Depot

Learn How To Remove And Install Various Tub Spouts

How To Replace A Bathtub Faucet In 4 Easy Steps

Installing A Tub Faucet Fine Homebuilding

How To Replace A Bathtub Faucet Simply Designing With Ashley

Fixing Faucets How To Replace A Difficult Tub Faucet Cartridge