Bathtub Handle Replacement: A Comprehensive Guide
Bathroom safety is paramount, and replacing worn-out or damaged bathtub handles is crucial. This guide will provide a comprehensive overview of the essential aspects involved in bathtub handle replacement, ensuring a safe and successful outcome.
Selecting the Right Handle
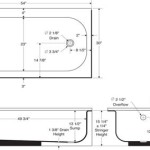
The choice of bathtub handle depends on several factors, including the type of bathtub, personal preferences, and safety requirements. Grab bars offer maximum support for individuals with mobility issues, while curved handles provide a comfortable grip. Consider the number and placement of handles necessary for optimal support.
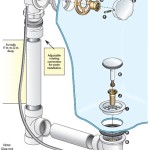
Preparing for Replacement
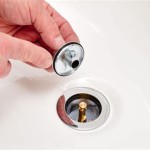
Before embarking on the replacement, gather necessary tools such as a wrench, screwdriver, and pliers. Remove any existing handles and clean the mounting area to ensure a secure bond for the new handles. If the old handles have not been replaced for an extended period, consult a professional plumber to assess the condition of the mounting studs and pipes.
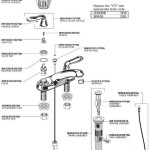
Installation Steps
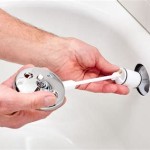
Mark the screw holes for the new handles and drill pilot holes if necessary. Insert the mounting screws and tighten them securely using a wrench. Ensure the handles are firmly attached and cannot be moved or rotated. If applicable, install any additional accessories such as towel bars or soap dishes.
Safety Considerations
When replacing bathtub handles, safety should be the primary concern. Use non-slip surfaces and secure the handles firmly to prevent accidents. Regularly inspect the handles and mounting screws for any signs of wear or damage, and replace them promptly if necessary.
Additional Tips
For heavier individuals or those with reduced mobility, install sturdy grab bars with non-slip grip pads. Adjust the handles to a comfortable height and angle to provide optimal support. If you are unsure about any aspect of the replacement process, do not hesitate to consult a qualified plumber for professional assistance.
By following these essential aspects, you can ensure a safe and successful bathtub handle replacement that meets your specific needs and enhances bathroom safety for years to come.

Danco Small Universal Replacement Faucet Handle In Clear Acrylic 10804 The Home Depot

Rless Faucet Shower Replacement Handle Clear For Tub S Com

Replace A Bathtub Faucet Handle Longer Version

Repairing A Leaky Two Three Handle Tub Shower Faucet

How To Replace A Shower Handle Homeserve Usa

Tub Shower Faucet Repair Kits Components At Com

How To Update A Bathroom With Low Cost Bathtub Shower Fixtures Fixture

Replace Upgrade Your Shower And Bath Handle

How To Fix A Leaking Bathtub Faucet Diy Family Handyman

Valley Single Handle Shower Replacement Parts
Related Posts