Bathtub Plug Replacement: A Comprehensive Guide
A malfunctioning bathtub plug can lead to water accumulation, inconvenience, and potential bathroom damage. Replacing it is a relatively simple task that can be completed with the right tools and materials. This guide provides step-by-step instructions and essential tips to ensure a successful bathtub plug replacement.
Step 1: Gather the Necessary Tools and Materials
Before starting the replacement process, gather the following tools and materials:
- New bathtub plug
- Adjustable wrench
- Channel-lock pliers
- Plumber's putty
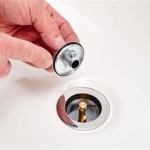
Step 2: Remove the Old Plug
Locate the retaining nut under the bathtub. Use the adjustable wrench to loosen the nut by turning it counterclockwise. Once the nut is loose, remove it completely and lift the old plug out of the drain hole.
Step 3: Apply Plumber's Putty
Roll a small rope of plumber's putty and apply it around the base of the new plug. This seal will prevent water from leaking around the plug.
Step 4: Insert the New Plug
Align the new plug with the drain hole and press it into place. Tighten the retaining nut under the bathtub by hand as much as possible.
Step 5: Secure the Nut
Use the adjustable wrench to tighten the retaining nut further. Ensure it is adequately tightened to prevent the plug from leaking or becoming loose.
Step 6: Test the Plug
Turn on the water and fill the bathtub. Check for leaks around the plug. If any leaks occur, tighten the retaining nut further until the leak stops.
Essential Tips
- Choose the correct size and type of bathtub plug for your drain.
- Use a generous amount of plumber's putty to create an effective seal.
- Tighten the retaining nut securely, but avoid overtightening.
- Test the plug thoroughly to ensure it operates correctly and prevents leaks.
- If you encounter any difficulties, do not hesitate to call a professional plumber for assistance.
By following these step-by-step instructions and incorporating the essential tips provided, you can successfully complete a bathtub plug replacement, ensuring a well-functioning and leak-free bathroom.

How To Replace A Bathtub Drain

How To Remove A Bathtub Drain The Home Depot

How To Remove A Bathtub Drain Stopper

Danco Lift And Turn Tub Drain Stopper In Chrome 88599 The Home Depot

Replacing A Tub Drain Bathtub Removal And Replacement

How To Remove 6 Diffe Bath Drain Types
:max_bytes(150000):strip_icc()/bathtub-drain-stopper-types-2718995-01-35b72b9323884e12bcd7bff7bddc755e.jpg?strip=all "The 7 Common Types Of Bathtub Drain Stoppers")
The 7 Common Types Of Bathtub Drain Stoppers

Brass Bathtub Plug Replacement Drain Valve Stopper Washbasin Metal Plugs Kitchen Bathroom Supplies Temu

Bathtub Drains And Drain Parts By Watco

Diy How To Replace Bathtub Drain Stopper Tutorial Clogged
Related Posts