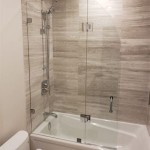
How to Install a Bathtub Surround: A Comprehensive Guide
Installing a bathtub surround is a simple yet effective way to enhance the aesthetics and functionality of your bathroom. By following the right steps and using the appropriate materials, you can create a durable and stylish surround that will last for years to come. Here's a comprehensive guide on how to do it like a pro:
1. Preparation:
Before you begin, it's crucial to properly prepare the area. Remove all old fixtures and fittings, including the bathtub, and clean the surface thoroughly. Ensure the walls are dry and level, and make any necessary repairs or adjustments. Additionally, gather all the necessary tools and materials, including a tub surround kit, adhesive, caulk, a utility knife, and a level.
2. Installing the Back Panel:
Start by applying adhesive to the back of the surround panel, following the manufacturer's instructions. Carefully align the panel with the wall studs and press it firmly into place. Check for level, and make adjustments if necessary. Use caulk to seal any gaps around the edges of the back panel.
3. Installing the Side Panels:
Next, install the side panels in the same manner. Apply adhesive to the edges that will overlap the back panel, and press them into place. Ensure they are aligned with the wall studs and level. Secure the side panels to the wall with screws or nails if necessary.
4. Installing the Trim:
The trim pieces help to hide the gaps and create a finished look. Apply adhesive to the trim pieces and press them firmly into place around the edges of the surround. Use a utility knife to trim any excess.
5. Sealing and Waterproofing:
Once the surround is installed, apply caulk generously around all the joints and edges. This will prevent water from seeping behind the surround and protect it from damage. Allow the caulk to dry completely before using the bathtub.
6. Reinstalling the Bathtub:
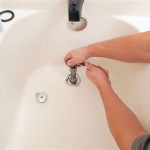
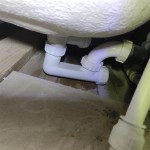
Carefully reinstall the bathtub into place, making sure it fits snugly against the surround. Reconnect the plumbing fixtures and check for any leaks. If everything is in order, you have successfully installed your bathtub surround!
Tips for Success:
- Always follow the manufacturer's instructions carefully.
- Use high-quality materials for durability and longevity.
- Ensure that the walls are properly prepared before installation.
- Allow ample time for the adhesive and caulk to dry before using the bathtub.
- If you encounter any challenges during installation, do not hesitate to seek professional assistance.

How To Install A Bath Tub Surround

How To Install A Bath Tub Surround

How To Install A Bath Tub Surround

How To Install A Bath Tub Surround

How To Install A Bathtub An Acrylic Tub And Surround Diy

How To Install A Glue Up Shower Enclosure The Home Depot

How To Install A Glue Up Shower Enclosure The Home Depot

3 Ways To Install A Tub Surround Wikihow Life

How To Install A Bath And Shower Surround Delta Classic 400

Tile Backer Board Installation 60 Bathtub Surround Walls For Part 2