How to Replace a Bathtub Faucet
Replacing a bathtub faucet can seem like a daunting task, but it's actually a relatively simple and straightforward process. With the right tools and a little patience, you can have your new faucet installed in no time. Here's a step-by-step guide to help you through the process:
Step 1: Gather your tools and materialsBefore you start, make sure you have all of the necessary tools and materials. You'll need:
- A new bathtub faucet
- Wrench
- Screwdriver
- Adjustable wrench
- Plumber's putty
- Towels
- Bucket
The first step is to turn off the water supply to your bathtub. This is typically done by turning off the valves under the sink. If you don't have access to the valves under the sink, you may need to turn off the main water supply to your home.
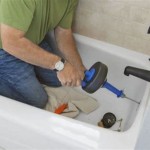
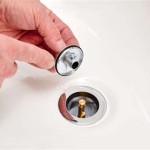
Step 3: Remove the old faucetOnce the water supply is turned off, you can remove the old faucet. Start by unscrewing the nuts that hold the faucet in place. Once the nuts are loose, you should be able to pull the faucet straight up and out of the bathtub.
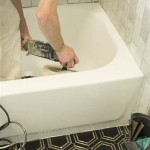
Step 4: Clean the areaOnce the old faucet is removed, you should clean the area where the new faucet will be installed. Remove any old plumber's putty or debris from the surface.
Step 5: Apply plumber's puttyApply a bead of plumber's putty around the base of the new faucet. This will help to seal the faucet and prevent leaks.
Step 6: Install the new faucetInsert the new faucet into the hole in the bathtub. Make sure that the faucet is properly aligned. Tighten the nuts that hold the faucet in place.
Step 7: Connect the water supply linesConnect the water supply lines to the new faucet. Make sure that the lines are properly tightened.
Step 8: Turn on the water supplyTurn on the water supply to your bathtub. Check for any leaks. If there are any leaks, tighten the nuts or adjust the plumber's putty.
Step 9: Enjoy your new faucetCongratulations! You have successfully installed your new bathtub faucet. Enjoy the new look and functionality of your bathroom.

How To Replace A Mobile Home Bathtub Faucet Parts Latest News

How To Install A Tub Spout The Home Depot With Thisoldhouse

How To Replace A Bathtub Spout Diy Family Handyman

How To Fix A Leaking Bathtub Faucet The Home Depot

How To Replace A Bathtub Faucet In 4 Easy Steps

How To Replace A Tub Spout Project Tutorial Bob Vila

Replacing A Tub Spout An Easy Repair Job Theworldlink Com

Learn How To Remove And Install Various Tub Spouts

How To Fix A Leaking Bathtub Faucet The Home Depot

Replacing Shower Tub Faucet How To Install A New
Related Posts