Fixing a Leaking Bathtub Faucet: A Comprehensive Guide
A leaking bathtub faucet can be a nuisance, wasting water and causing damage to your bathroom. Fortunately, it's usually a relatively easy fix that you can do yourself with a few basic tools and materials.
Step 1: Gather Your Tools and Materials
Before you start, gather the following:- Adjustable wrench
- Phillips head screwdriver
- Flat head screwdriver
- Allen wrench (if your faucet has one)
- New faucet cartridge (if needed)
- Teflon tape
- Plumber's putty
- Bucket
- Shop towels
Step 2: Turn Off the Water Supply
Locate the water supply valves for your bathtub. They are usually located under the sink or behind the bathtub.
Turn off both the hot and cold water valves.
Step 3: Remove the Faucet Handle
Use the Phillips head screwdriver to remove the screws that secure the faucet handle.
Once the screws are removed, pull the handle straight off the faucet.
Step 4: Remove the Faucet Stem
Use the adjustable wrench to loosen the packing nut that secures the faucet stem.
Once the packing nut is loose, you can remove the faucet stem by turning it counterclockwise.
Step 5: Inspect the Faucet Stem
Inspect the faucet stem for damage. If the stem is worn or damaged, it will need to be replaced.
Step 6: Apply Teflon Tape to the New Faucet Stem
If you are replacing the faucet stem, wrap a few layers of Teflon tape around the threads of the new stem.
This will help to prevent leaks.
Step 7: Install the New Faucet Stem
Insert the new faucet stem into the faucet body.
Turn the stem clockwise until it is snug.
Step 8: Reinstall the Packing Nut
Reinstall the packing nut and tighten it with the adjustable wrench.
Step 9: Reinstall the Faucet Handle
Reinstall the faucet handle and secure it with the screws.
Step 10: Turn On the Water Supply
Turn on the hot and cold water valves.
Check for leaks.
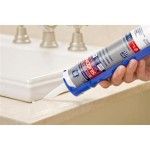
Step 11: Apply Plumber's Putty
If there are any leaks, apply a bead of plumber's putty around the base of the faucet.
This will help to seal the leaks.
Step 12: Enjoy Your Leak-Free Bathtub Faucet
Once you have completed these steps, your bathtub faucet should be leak-free.
Enjoy your newly fixed faucet!

How To Fix A Leaky Bathtub Faucet The Home Depot

How To Fix A Leaky Bathtub Faucet 6 Ways Stop Drips

How To Fix A Leaking Bathtub Faucet The Home Depot

How To Fix A Leaky Bathtub Faucet Removing The Spout From

How To Fix A Leaking Bathtub Faucet Repair Replace

How To Fix A Leaky Bathtub Faucet Delta Shower Cartridge L Replace

11 Easy Steps To Fix A Leaking Bathtub Faucet In 2024 Spout

Faucet Repair How To A Leaky Bath

How To Stop A Dripping Bathtub Faucet Nj Plumbing Repair Replacement And Maintenance

How To Fix A Leaky Bathtub Faucet 6 Ways Stop Drips