Caulking Bathtub With Silicone: A Step-by-Step Guide to a Watertight Seal
Caulking your bathtub with silicone is a critical step in preventing water damage to your bathroom. Silicone caulk creates a watertight seal between the bathtub and the surrounding wall or tile, preventing leaks that can lead to mold, mildew, and structural damage. Here's a comprehensive guide to caulking your bathtub with silicone like a pro: ### Step 1: Gather Your Supplies Before you start, gather all the necessary supplies: * Silicone caulk (100% silicone, not acrylic) * Caulk gun * Utility knife or razor blade * Painter's tape * Rubbing alcohol * Rags or paper towels * Gloves (optional) ### Step 2: Prepare the Area 1. Clean the bathtub and surrounding area thoroughly with rubbing alcohol and a clean rag. Make sure to remove all dirt, soap scum, and mildew. 2. Use painter's tape to create a clean, straight line where the caulk will be applied. This will help you achieve a neat and even finish. ### Step 3: Cut the Caulk Tube 1. Wear gloves if desired to protect your hands from the caulk. 2. Cut the tip of the caulk tube at a 45-degree angle. The size of the cut will depend on the desired bead size. A smaller cut will create a thinner bead, while a larger cut will create a thicker bead. ### Step 4: Apply the Caulk 1. Insert the caulk tube into the caulk gun. 2. Hold the caulk gun at a 45-degree angle to the surface, with the tip of the tube just above the painter's tape. 3. Squeeze the trigger of the caulk gun slowly and evenly, applying a continuous bead of caulk along the seam between the bathtub and the wall or tile. 4. Maintain a consistent pressure on the trigger to ensure a uniform bead. ### Step 5: Smooth the Caulk 1. Use your finger or a damp cloth to smooth the caulk, pressing it firmly into the seam. 2. Make sure the caulk is evenly distributed and free of any gaps or air bubbles. ### Step 6: Remove the Painter's Tape 1. Carefully remove the painter's tape while the caulk is still wet. 2. If any caulk adheres to the tape, use a utility knife or razor blade to trim it away. ### Step 7: Allow the Caulk to Dry 1. Allow the caulk to dry completely according to the manufacturer's instructions. This may take anywhere from 24 to 72 hours. 2. Avoid using the bathtub or shower during this time to prevent disturbing the caulk. ### Step 8: Clean Up 1. Use a damp cloth to wipe away any excess caulk from the surrounding area. 2. Dispose of the empty caulk tube and other materials properly. By following these steps, you can successfully caulk your bathtub with silicone and create a watertight seal that will protect your bathroom from moisture damage.
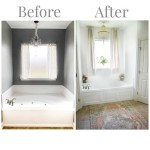
Caulking A Bathtub Simple Steps For Successful Seal

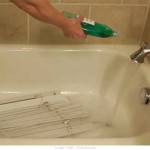
Baths Smoothing Silicone Caulk Plus Other Caulking Tips Fixing Our Historic House

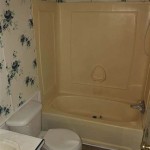
How To Use Bathroom Caulk For A Fresh New Seal

How To Caulk A Bathtub 13 Steps With Pictures Wikihow

How To Caulk A Bathtub Like Pro

How To Caulk A Bathtub 13 Steps With Pictures Wikihow

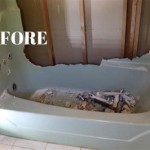
Caulking With Silicone Don T Do It Instatrim

Top Tip On How To Apply Silicone Sealant With Step By Pictures

How To Caulk A Bathtub Or Shower Tile Pro Depot

File Between Bathtub And Tiles Ready For Silicone Caulking Jpg Wikimedia Commons