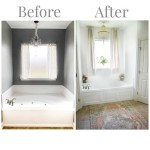
Bathtub Cover DIY: A Comprehensive Guide for a Luxurious and Functional Upgrade
Bathtub covers offer a practical and aesthetic solution to protect your bathtub from dust, debris, and unsightly scratches. Whether you're seeking to extend the life of your bathtub or add a touch of style to your bathroom, a DIY bathtub cover is a rewarding project that can enhance the overall ambiance of your space. This comprehensive guide will provide you with step-by-step instructions, essential material recommendations, and helpful tips to create a customized and durable bathtub cover that meets your specific needs.
Materials Required:
- Plywood (3/4-inch thickness recommended) - Measuring tape - Jigsaw or circular saw - Sandpaper or electric sander - Wood filler - Paint or stain (optional) - Hinges (optional) - Handles or knobs (optional)
Step-by-Step Instructions:
1. Measure and Cut the Plywood: Measure the length and width of your bathtub, including the lip or rim. Cut the plywood to these dimensions using a jigsaw or circular saw.
2. Sand and Smooth the Edges: Use sandpaper or an electric sander to smooth all cut edges and remove any splinters.
3. Fill in Any Gaps: Apply wood filler to any gaps or holes in the plywood to create a smooth surface. Allow the filler to dry and sand it flush with the surrounding wood.
4. Paint or Stain (Optional): If desired, apply a coat of paint or stain to the cover to protect it from moisture and match the decor of your bathroom.
5. Install Hinges (Optional): If you prefer a hinged cover, attach hinges along the back edge of the cover. Align them evenly and secure them with screws.
6. Add Handles or Knobs (Optional): For easy handling, install handles or knobs on the front or side of the cover. Use screws to attach them securely.
Tips for a Professional-Looking Bathtub Cover:
- Use Moisture-Resistant Plywood: Marine-grade plywood is a great choice as it is highly resistant to water damage and warping.
- Protect the Cover from the Elements: If the bathtub cover will be exposed to moisture or sunlight, apply a clear sealant or weatherstrip to prevent damage.
- Consider the Overall Aesthetics: Choose a paint color or stain that complements your bathroom's decor and creates a cohesive look.
- Customize the Design: Use your creativity to personalize the cover by adding decorative elements such as trim, molding, or stencils.
A DIY bathtub cover not only protects your investment but also adds a touch of elegance and functionality to your bathroom. By following these simple steps and incorporating the provided tips, you can create a customized and durable cover that will enhance the aesthetics and longevity of your bathtub.
How To Make A Beautiful Removable Bathtub Cover
How To Make A Beautiful Removable Bathtub Cover
Make A Diy Bathtub Cover And Avoid Cleaning Your Bath Better Homes Gardens
How To Make A Beautiful Removable Bathtub Cover
How To Make A Beautiful Removable Bathtub Cover Diy Garden Tub
How To Make A Beautiful Removable Bathtub Cover
Mum Praised For Kmart Using Unusual Item Fantastic Idea
Bathtub Cover Diy Tub Bathroom Remodel
Make A Diy Bathtub Cover And Avoid Cleaning Your Bath Better Homes Gardens
How To Make A Beautiful Removable Bathtub Cover

