Moen Bathtub Faucet Cartridge Replacement: A Step-by-Step Guide
##
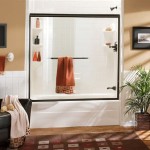
A leaky or malfunctioning bathtub faucet cartridge can be a major inconvenience, leading to water damage and increased utility bills. Fortunately, replacing a Moen bathtub faucet cartridge is a relatively simple task that can be completed in under an hour with the right tools and materials.
### Tools and Materials You'll Need
* Adjustable wrench * Allen wrench * Flathead screwdriver * Pliers * Replacement Moen bathtub faucet cartridge (make sure you get the correct model for your faucet) * Plumber's putty * Towel * Bucket ###Step-by-Step Guide
1.Turn off the water supply.
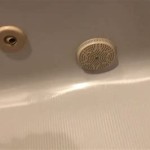
The first step is to turn off the water supply to your bathtub faucet. This is usually done by turning the valve located beneath the sink or behind the access panel in the wall. If you can't find the valve, you can also turn off the main water supply to your home. 2.Remove the faucet handle.
Once the water supply is turned off, you can remove the faucet handle. This is usually done by loosening the set screw on the side of the handle with an Allen wrench. Once the set screw is loose, you can pull the handle straight off. 3.Remove the old cartridge.
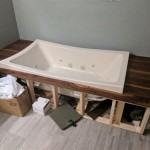
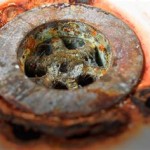
With the handle removed, you can now access the old cartridge. Use a flathead screwdriver to pry the old cartridge out of the faucet body. Be careful not to damage the faucet body. 4.Apply plumber's putty to the new cartridge.
Before installing the new cartridge, apply a thin layer of plumber's putty to the threads. This will help to create a watertight seal. 5.Install the new cartridge.
Insert the new cartridge into the faucet body and tighten it by hand until it is snug. Do not overtighten the cartridge, as this could damage the faucet body. 6.Reattach the faucet handle.
Once the new cartridge is installed, you can reattach the faucet handle. Simply slide the handle onto the stem and tighten the set screw. 7.Turn on the water supply.
Once the faucet handle is reattached, you can turn on the water supply. Check for leaks around the base of the faucet handle and the cartridge. If you see any leaks, tighten the cartridge or the handle until the leak stops. ###Tips for Replacing a Moen Bathtub Faucet Cartridge
* Make sure you get the correct replacement cartridge for your Moen bathtub faucet. There are many different models of Moen bathtub faucets, so it's important to get the one that is specifically designed for your faucet. * If you're not comfortable working on plumbing fixtures, you can always hire a professional plumber to replace the cartridge for you. * Be careful not to overtighten the cartridge or the handle, as this could damage the faucet body. * If you have any questions about replacing a Moen bathtub faucet cartridge, you can always consult the Moen website or contact Moen customer service.
How To Repair Remove Replace A Leaking Moen Shower Faucet Cartridge Valve With Single Knob 1225

Remove And Install Moen 1222 Cartridge Repair Shower Tub Faucet Set Temperature Limit

Faucet Cartridges Shower Moen Solutions

Moen Brass Single Handle Replacement Cartridge 1200 The Home Depot

Which Moen Cartridge Do I Need

Moen 1 Handle Brass And Plastic Faucet Tub Shower Cartridge In The Stems Cartridges Department At Com

Moen 2 Handle Replacement Cartridge For Roman Tub Faucets 1248 The Home Depot

Moen 1 Handle Brass And Plastic Tub Shower Valve Cartridge In The Faucet Stems Cartridges Department At Com

1225 Cartridge Single Handle Shower Moentrol Valve Moen Solutions

Moen Posi Temp Pressure 0 9375 In D Balanced Shower Cartridge 1222 The Home Depot