Essential Steps for Removing a Bathtub Faucet
Replacing a bathtub faucet requires the removal of the old one. While it may appear daunting, the process is relatively straightforward with the right tools and a little knowledge. By following these step-by-step instructions, you can safely and effectively remove your bathtub faucet.
1. Gather Necessary Tools
Assemble the following tools before starting:
- Adjustable wrench
- Plumber's wrench
- Phillips and flathead screwdrivers
- Basin wrench
- Teflon tape
- Bucket or large container
2. Turn Off Water Supply
Locate the water supply valves beneath the sink or inside the cabinet below. Turn the handles clockwise to shut off both the hot and cold water supply lines.
3. Drain the Faucet
Open both handles on the faucet to drain any remaining water. Tilt the faucet down to speed up the process.
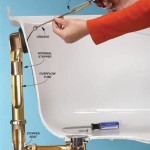
4. Disconnect the Water Lines
Use the basin wrench to loosen the nuts connecting the water lines to the faucet body. Place a bucket beneath to catch any water that spills.
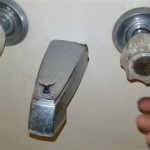
5. Remove the Handles
Remove any screws holding the handles in place. Some models may have caps that need to be removed first. Pull the handles straight off the stem.
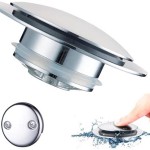
6. Remove the Escutcheon
The escutcheon is the decorative plate surrounding the handles. Use a flathead screwdriver to pry it off, being careful not to damage the surface.
7. Unscrew the Mounting Nuts
Beneath the escutcheon are two mounting nuts that hold the faucet in place. Use the adjustable wrench to carefully loosen and remove these nuts.
8. Lift Off the Faucet
Once the mounting nuts are removed, gently lift the faucet straight up and off the bathtub.
9. Apply Teflon Tape
Wrap a few layers of Teflon tape around the threads of the new faucet's mounting nuts.
10. Reinstall the Faucet
Place the new faucet over the mounting posts and hand-tighten the mounting nuts. Use the adjustable wrench to further tighten them, but avoid overtightening.
11. Reattach the Handles and Escutcheon
Slide the handles back onto the stems and secure them with the screws. Carefully place the escutcheon over the mounting posts and secure it.
12. Reconnect the Water Lines
Hand-tighten the water line nuts onto the faucet body. Use the basin wrench to further tighten them, ensuring they are secure but not overtightened.
13. Turn On Water Supply and Test
Turn the water supply valves back on and check for any leaks around the faucet. Tighten any loose connections if necessary. Allow the water to run for a few minutes to remove any debris from the lines.

How To Fix A Leaking Bathtub Faucet Diy Family Handyman

3 Ways To Remove A Tub Faucet Wikihow

How To Replace A Mobile Home Bathtub Faucet White Knight

3 Ways To Remove A Tub Faucet Wikihow

Learn How To Remove And Install Various Tub Spouts

How To Change A Bathtub Faucet 14 Steps With Pictures Wikihow

Replacing A Tub Spout An Easy Repair Job Theworldlink Com

How To Replace A Bathtub Spout Diy Family Handyman

Learn How To Remove And Install Various Tub Spouts

How To Replace A Bathtub Spout Home Plumbing Repair Series