DIY Reglaze Bathtub: A Comprehensive Guide
Reglazing a bathtub is a cost-effective way to restore its original appearance and functionality without the hassle and expense of a complete replacement. This DIY project is accessible to most homeowners with some basic tools and materials. Here's a comprehensive guide to walk you through the essential aspects of DIY bathtub reglazing:
Preparation
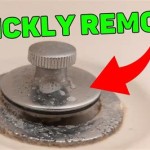
The key to a successful reglazing project lies in thorough preparation. Start by removing all fixtures, such as the faucet, drain, and overflow plate. Thoroughly clean the bathtub's surface using a degreaser or denatured alcohol to remove any dirt, grime, or soap residue. Roughen the bathtub's surface using fine-grit sandpaper or an etching solution to enhance adhesion.
Safety Precautions
Reglazing involves the use of chemicals and solvents that can be hazardous. Ensure adequate ventilation by opening windows or using a fan. Wear appropriate safety gear, including gloves, eye protection, and a respirator, to prevent skin and respiratory irritation. Follow the manufacturer's instructions and safety guidelines carefully.
Materials and Tools
Gather the necessary materials, including a reglazing kit specifically designed for bathtubs. The kit typically includes a primer, base coat, topcoat, and other required supplies. You'll also need tools like a drill, sandpaper or etching solution, mixing paddles, brushes, and a roller. A spray gun can be used for a professional-looking finish, but it requires practice and additional equipment.
Application
Apply the primer evenly to the prepared bathtub surface. Allow it to dry according to the manufacturer's instructions. Mix the base coat thoroughly and apply it to the primer using a brush or roller. Smooth out the surface to create an even and consistent layer. Let the base coat dry completely.
Apply the topcoat to the cured base coat. This layer will give the bathtub its final color and shine. Use a brush or roller for a smooth application. If using a spray gun, apply thin, even coats and allow each coat to dry slightly before applying the next.
Drying and Curing
Allow the reglazing to dry for the recommended time as specified by the manufacturer. This can range from several hours to several days. During this period, keep the bathroom well-ventilated and avoid using or touching the bathtub. Once the reglazing has dried, reattach the fixtures and hardware.
The reglazed bathtub will continue to cure for several weeks after application. During this time, avoid using harsh cleaning agents or abrasive materials. Clean the bathtub regularly with mild soap and water to maintain its appearance.

My Painted Bathtub 5 Years Later An Honest Review Of Refinished Jacuzzi Tub

Step By Tutorial On How To Diy Reglaze Resurface And Refinish A Bathtub Girlvshouseblog Blo Com Makeover Pink Tub Bathroom

Bathtub Refinishing Kit Guide Diy Bathroom Update

How To Reglaze A Bathtub And Tile Surround Daly Digs

How To Refinish A Bathtub On Budget

How To Make Your Bathtub And Shower Tile Look New Again Life Should Cost Less

How To Paint A Tub With Rustoleum What Not Do

1 Bathworks Diy Bathtub Refinishing Kit How To

Do Diy Bathtub Resurfacing Kits Really Work Todd S Bathtubs

Diy Painted Bathtub Follow Up Your Questions Answered Addicted 2 Decorating

