Essential Aspects of Trim for Bathtub
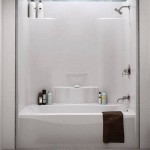
Trim for bathtubs serves both functional and aesthetic purposes. It conceals the gap between the bathtub and the surrounding wall, preventing water leakage and enhancing the visual appeal of the bathroom. Here are some essential aspects to consider when selecting and installing trim for your bathtub:
Materials
Trim for bathtubs is commonly made from a variety of materials, each with its unique advantages and disadvantages:
- Vinyl: Affordable, waterproof, and easy to install, but may not be as durable as other options.
- Ceramic tile: Durable, moisture-resistant, and available in a wide range of colors and styles, but requires professional installation.
- Natural stone: A premium option that offers durability, elegance, and a timeless appearance, but can be expensive and difficult to install.
- Composite marble: Blends natural marble with synthetic materials, creating a durable, moisture-resistant, and affordable alternative to natural stone.
- Acrylic: Seamless, waterproof, and available in a wide range of colors, but may be prone to scratches and stains.
Style and Design
The style and design of the trim should complement the overall aesthetic of the bathroom. Consider the following factors:
- Shape: Trim can come in various shapes, such as square, rounded, or beveled.
- Size: The width and height of the trim will impact the overall look.
- Color: Choose a color that matches or complements the bathtub and the surrounding tiles or walls.
- Texture: Smooth, textured, or patterned trim can create different visual effects.
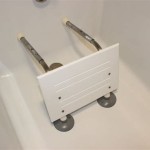
Installation
Trim installation requires precision and attention to detail. Ensure the following steps are taken:
- Prepare the surface: Clean the area where the trim will be installed and remove any debris or moisture.
- Measure and cut the trim: Measure the gap between the bathtub and the wall and cut the trim to fit.
- Apply adhesive: Apply a suitable adhesive to the back of the trim and press it firmly into place.
- Seal the joints: Use a waterproof sealant to fill any gaps between the trim and the bathtub or wall.
- Caulk the edges: Apply a bead of caulk around the edges of the trim to prevent water penetration.
Maintenance
Regular maintenance will ensure the longevity and appearance of your bathtub trim:
- Clean regularly: Use a mild cleaning solution and a soft cloth to wipe down the trim.
- Inspect for damage: Check the trim periodically for any cracks, chips, or leaks.
- Reseal when necessary: Over time, the sealant around the trim may deteriorate and require reapplication.
- Avoid harsh cleaners: Do not use abrasive or acidic cleaners on the trim, as they can damage the surface.
Conclusion
Selecting and installing the right trim for your bathtub can enhance both the functionality and appearance of your bathroom. Consider the materials, style, installation techniques, and maintenance requirements to ensure that your bathtub trim stands the test of time and complements the overall design of your bathroom.

How To Add Decorative Moulding A Bathtub Marci Schneider

What Is A Bathtub Trim Everything You Need To Know For Easy Installation Badeloft

10 Bathroom Makeover Quick And Easy Bathtub Trim Hometalk

Bathroom Makeover How To Add Decorative Molding A Bathtub In My Own Style

Bathroom Makeover How To Add Decorative Molding A Bathtub In My Own Style

Bathroom Makeover How To Add Decorative Molding A Bathtub In My Own Style

Diy Tub Skirt Decorative Panel For A Standard Soaking

How To Add Decorative Moulding A Bathtub The Home Depot

Bathroom Makeover How To Add Decorative Molding A Bathtub In My Own Style

Bathroom Makeover How To Add Decorative Molding A Bathtub In My Own Style