3-Handle Bathtub Faucet Replacement: A Comprehensive Guide
Replacing a 3-handle bathtub faucet may seem daunting, but it can be accomplished with the right tools and a bit of know-how. This guide will walk you through the essential aspects of this task, ensuring a successful and leak-free installation.
Tools and Materials Required
- Adjustable wrench
- Allen wrench (if applicable)
- Phillips head screwdriver
- Work gloves
- New 3-handle bathtub faucet
- Plumber's putty
- Teflon tape
- Bucket or bowl
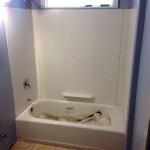
Step 1: Prepare the Work Area
Turn off the water supply lines beneath the sink or behind the bathtub access panel. Open the bathtub faucet to release any remaining water. Wear gloves to protect your hands from water and sharp edges.
Step 2: Disconnect the Old Faucet
Using an adjustable wrench, carefully loosen the nuts that connect the water supply lines to the old faucet. Disconnect the lines and allow the remaining water to drain into a bucket. Remove the handle screws with a Phillips head screwdriver and lift the handles off.
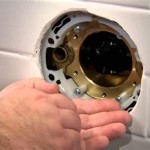
Step 3: Remove the Cartridge or Stems
Most 3-handle faucets have cartridges or stems that control the water flow. If you have cartridges, use an adjustable wrench or cartridge puller to remove them. If you have stems, use an Allen wrench to loosen and remove the packing nuts, then pull the stems out.
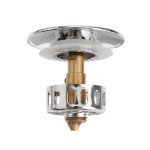
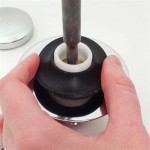
Step 4: Install the New Cartridge or Stems
Apply a thin bead of plumber's putty around the base of the new cartridge or stem. Insert it into place and hand-tighten it as much as possible. Use the adjustable wrench to fully tighten it, but do not overtighten.
Step 5: Connect the Faucet Handles
Slide the handles onto the cartridges or stems and secure them with the handle screws. Snug them up with a screwdriver, but again, avoid overtightening.
Step 6: Connect the Water Supply Lines
Apply Teflon tape to the threads of the water supply lines and screw them back onto the faucet. Use an adjustable wrench to hand-tighten the nuts securely. Open the water supply lines and check for leaks.
Step 7: Finalize the Installation
If there are no leaks, you can complete the installation. Wipe away any excess plumber's putty or water and enjoy your newly replaced 3-handle bathtub faucet.

Lincoln S Tub And Shower Rebuild Kit For Arrowhead 3 Handle Faucets 111815 The Home Depot

3 Handle Bathtub Shower Faucet Combinations At Com

Danco 3 Handle Tub Shower Trim Kit For Pfister In Chrome 39695 The Home Depot

Lincoln S Tub And Shower Rebuild Kit For American Standard Renu 3 Handle Faucets 111830 The Home Depot

The 6 Best 3 Handle Shower Faucets Made Home

Pfister Repair Parts For Three Handle Tub Shower Series

Lincoln S Tub And Shower Rebuild Kit For Kohler 3 Handle Faucets 111869 The Home Depot

Danco Central Brass 3 Handle Tub And Shower Faucet Trim Kit In Chrome Valve Not Included 39616 The Home Depot

Repairing A Leaky Two Three Handle Tub Shower Faucet

Convert A Two Or Three Handle Tub Shower Valve To Single With No Tile Repair Wrench Re Pipe Riverside Corona Norco Eastvale 951 780 7283
Related Posts